Sunday, January 11, 2015

DIY Fleece Crib Teething Guard


Pin it!

This idea is SO GENIUS that I don't know why I didn't think of it first. I'm not a creative person, if you can't tell from my previous arts-and-craftings posts, but even I can do this. The boys only have 2 bottom teeth right now, so I may have jumped the gun on this as far as the necessity of it goes, but it can't hurt to have it in place early. Oliver specifically is big on gumming and/or mouthing things and you just never know when more teeth are going to pop up. But we're ready - so bring it on teefers!


It took me about an hour to make these DIY fleece crib teething guards. And that was with "help" in the form of two tiny, crazy people who kept sitting on my fleece, stealing my scissors and running off with my measuring tape. If they were hired help, I would have fired them. But, alas, I am forced to put up with their shenanigans day in and day out. Could be worse, I suppose. They could have spit up on my fleece. Or cut their hair with the scissors. Or tied up one of my cats with the tape... it actually didn't go that badly, now that I think of it. 

The "help" hard at work.
The only thing you need for this project that you don't already have within about 20 feet of you is fleece. About a yard of fleece per crib. We took an afternoon errand-running trip to JoAnns Fabrics for this and scored 2 yards of super cute owl patterned fleece for less than ELEVEN BUCKS. SCORE. #winning. Heck yeah. That's a steal when you're comparing it to purchasing one (probs not even in a cute pattern) for about $30 from Target, Amazon or Babies R Us. Yes, that's $30 EACH. 

While at JoAnns Fabrics, all of the little old ladies shopping for crafting supplies stopped to "oooh" and "aaaah" at the boys, who were just chilling in their stroller, loving the attention. Somehow 3 of the ladies in the store managed to work into the small talk that they also had twins. One lady apparently didn't even know she was pregnant until she popped out 2 babies. But that was 40 years ago. Thank the Lord Baby Jesus (sorry for the Talladega Nights reference there) for modern medicine, prenatal care, and fetal monitoring.
Running off with my measuring tape... again!

Here's the instructions for those of you who need them... it's so super easy though!

1. Measure the length of the section of crib you are covering. Write it down. Measure the width (all the way around the rail) and add 3 inches to each side, for an additional 6 inches. This is so you will have enough fabric to make the ties. Write this number down.

2. Cut out a piece of fabric with these measurements and fold it in half "hot-dog" style (Yup, that's the technical term). Cut 3 inch slits into the non-folded side, about 1 1/2 - 2 inches apart all the way along the length of the fabric.

3. Place fabric over the rail and begin double knotting using the ties you have just cut. Any pieces that cannot be tied (parts that are right at a rail) can be tucked up under the cover for a finished presentation.

4. Repeat with all rails that baby can nom on. DONE! Boom.

**Disclosure 

Monday, January 5, 2015

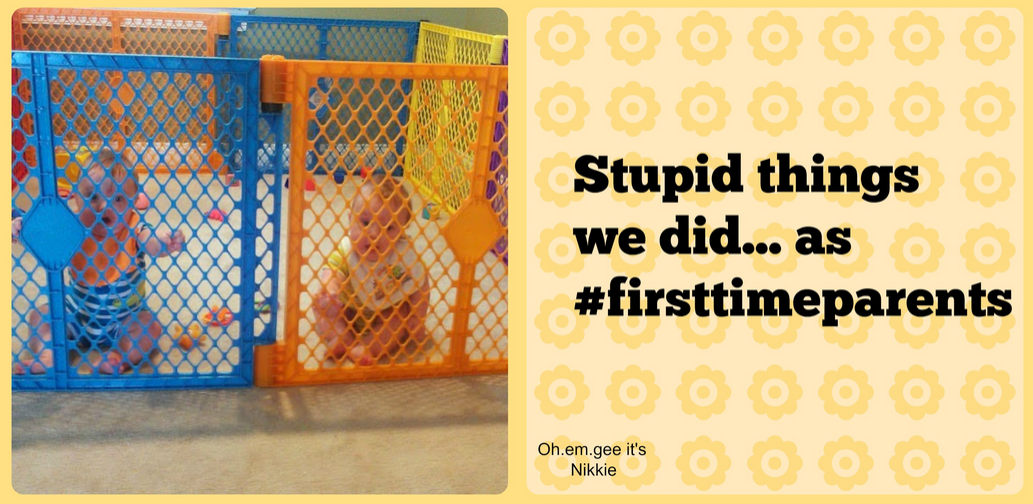
Stupid Things We Did as First Time Parents

Don't forget to follow Oh.em.gee it's Nikkie on Facebook - we'll have our first giveaway coming soon!


Andy and I tried to stay up late on New Years Eve. We made it to later than usual, but that was only 9:30 p.m. Meh, midnight is over-rated anyway. We spent about an hour laying in bed on our phones going through pictures from the last 9 months since our adorable bundles of joy came into the world. Every so often we came across a picture that just made us stop and say "what the hell were we thinking?"

These things seemed like a good idea, or a necessity, at the time. But, man, looking back a few months later we realized we were newbies. New to the game of parenting and figuring out what worked for our family. New to all of the toys, contraptions, and baby items that come along with said babies. Here's a look at 2014 and all (some. only the things that have photographic evidence!) of the stupid things we did as first time parents. Take note, newbies, take note.


We thought we could contain the babies and their mess. To their nursery and one area of our living room. We even purchased this awesome rainbow colored play yard. For the first few weeks that we had it, I insisted that the babies were enclosed in the play yard if I walked away from them. They could barely sit and roll - they were not mobile yet - there was no need for them to be in baby prison when they weren't going anywhere! Silly me.

This play yard fence now spans our living room keeping the no-no's off-limits - the stone fireplace, TV, computer and all of the cords. It also kept their grubby little hands off of the Christmas tree while it was set up! 


Baby butts are slippery when wet! How do you keep them from slipping and sliding all over the bath tub? You put a towel at the bottom, duh! Ugh, you have to keep pushing the towel down! Their feet are getting caught under it! I have to wring it out to dry every night? Geez, now it smells like mildew in here. Surely, there has to be a better way?!?

Apparently there is. Someone already invented non-slip mats for your bath tub. We finally figured this out and bought this super cute one from Target. #firsttimeparents.


No more slipping and sliding in the bath tub! However, I do give myself a couple of points for being creative with a towel. Just kidding, it's embarrassing. 


We thought we had to take our newborns on daily walks. You know, like a dog. These little babies were born in March and before my maternity leave was over in May, we were going on daily walks. Yup. They couldn't sit up (as shown) or appreciate the outdoors. And since it's early spring, I'm thinking it was probably too chilly for them in their short-sleeved onesies with a light blankie draped over top.

They make these awesome things called infant car seats that attach to this stroller. Keeps baby snug and upright. And you can bundle them with blankets IF you really want to go on a walk with newborns in the cold shortly after having a C-section. We actually put these little guys in their stroller like this at about 2 weeks old - I can't even. I'm hanging my head in shame and embarrassment right now.


We didn't realize that our babies are not toys. I mean, we understood it on a certain level, but on another level we didn't exactly consider the best interests of the babies at all times. This 12-ish week old baby should have been inside, probably sleeping, NOT going for his first dip in the pool in the blazing sun... without a hat. Or sunscreen.

We went entirely too many places to please entirely too many people by "showing off" the babies and doing meet-and-greets. Nope. Nope nope nope. Babies are not toys! I'm sure they would have loved to stay home and sleep, eat and poop - just what infants do best!

Looking back at these pictures make me wonder what else we did as first time parents that wasn't documented, but was equally stupid! Do you have anything to add to this list? What was the strangest thing you did/thought as a first time parent?

**Disclosure

 
a Rafflecopter giveaway

Sunday, December 28, 2014

Life with Twins at 9 Months


Practicing ALL THE SKILLS - Standing, cruising, climbing...

The boys have grown 9 inches in the last month and a half! Not really. But it sure does seem like it! They look like tiny little adults and even though they aren't quite toddlers yet, they just don't seem like "infants" anymore. Our schedule is becoming significantly more flexible now that the boys are able to stay awake for longer periods of time and can eat a larger variety of foods. We're down to 2 naps a day (sometimes I can only squeak one out of them!) and sleeping through the night on a regular basis. New moms of twins: YOU WILL GET THERE. The first few months seemed rough, but now it's a breeze and (dare I say it?) just as easy as having a singleton.


Our Schedule:
7 a.m. - Wake up
8 a.m. - First bottle
9 a.m. - Breakfast of purees
9:30 a.m. - Nap
11 a.m. - Bottle #2
1:30 p.m. - Lunch of finger foods or purees
2 p.m. - Bottle #3 and Nap #2
5 p.m. - Daaaa gets home from work and bottle #4
6:30 p.m. - Dinner of purees
6:45 p.m. - Bath time
7:15 p.m. - Bedtime bottle and sleep!

Looks simple enough, right? Successfully executing this schedule is about akin to pulling off a bank robbery. So.many.things can go wrong. So many.

Usually, we're pretty close to schedule though and life is good. Only a handful of times have I wanted to run out the door to the closest Starbucks when Andy got home from work.

Nutritious lunch of broccoli, cheese, carrots and Cheerio's
Where we are now:
  • We have 2 bottom teeth, each!
  • We can pull up to standing
  • We cruise along furniture and toys
  • We crawl at lightning speed
  • We can stand without holding on to anything for small periods of time
  • We are starting to communicate our wants/needs
  • We can copy some noises that you make

We saw snow for the first time!
What we're working on: 
  • Making syllable sounds - Emmett just started with the "da-da-da's" but nothing for Oliver yet
  • Playing peekaboo, pat-a-cake and clapping
  • Walking - we're so close!
  • Feeding ourselves table food
  • Using sippy cups
  • Climbing stairs/people/toys
And we graduated to "big boy" pajamas... with feets! 
 Before I know it, I'll have to start planning their FIRST BIRTHDAY PARTY already! [insert me hyperventilating here!]

Thanks for stopping by and checking out what the boys are up to this month... see ya next time!!!

Monday, December 22, 2014

Candy Christmas Trees


"I have SO MUCH FREE TIME!" - said no twin mom ever. Well, I don't have much "free" time (where I'm not on call at a moment's notice) but I do have a fair amount of down time throughout the day... think nap time, when the boys are feeding themselves or playing quietly. So what's a person to do with a whole day at home? Well, I sing a lot. I have semi-one-way conversations with the boys. I crawl around on the floor until my knees are bruised and my back hurts like the Dickens. In between all of that, I do like to do something for me. Whether it's making a nice lunch, sitting on the couch in peace and quiet for 20 minutes, or making something crafty - I need something to keep me sane.

I stumbled upon this idea on, you guessed it, Pinterest. And it looked so easy that I didn't even open the link to the blog. I just went off of what I saw in the picture. I didn't have any of the ingredients or utensils at home already, so we had to make a trip to Target. After my last few escapades to Target, Andy has official banned me from going there alone. I JUST CAN'T HELP MYSELF. It's freaking Turrrget!

What do you need?
  • Wax paper
  • Pretzel rods
  • Green candy melts
  • Plastic Ziploc bag or pastry bag (is that what they're called?)
  • Mini M&M's
  • Festive sprinkles (optional) 
  • Plastic goodie bags (optional)
What do you do?

1. Cover your counter top in wax paper and lay out your pretzel rods, spacing them several inches from each other. 

2. Melt candy melts over a double boiler and then transfer to plastic bag. Cut a very small corner of the plastic bag.

3. Beginning at the top of the pretzel rod, slowly squeeze the candy out of the bag, gradually making a tree shape as you go. Top with M&Ms or sprinkles and let cool completely.

4. I filled (3 per bag is comfortable) little plastic goodie bags with these treats to give to people along with their Christmas presents. We also handed some out at the pediatrician's office and I will be taking a tray to work with me.