Showing posts with label whats-cooking. Show all posts

Tuesday, May 19, 2015

Homemade Pouches: Hidden Veggies


Don't forget to follow Oh.em.gee it's Nikkie on Facebook for the newest posts!

If you don't have one of these Infantino Squeeze Stations to make your own fruit and veggie filled pouches at home, then you should stop reading this now. Go to Amazon. Buy a station and don't forget a 50ct pack of the pouches (you'll want them!) Wait for it to be delivered. Then hit up the grocery store!

These pouches are good for babies who are just starting out on solids because you can make them yourself and know exactly what fruit or veggie you are serving them. Plus, Infantino has these cute little spoon attachments so you can feed baby from a spoon, even on the go.

The boys are 14 months now and we have been experimenting with homemade pouch flavors since I received this as a Christmas present (Thanks T's!) I ALWAYS always always always throw a vegetable into these flavorful combinations... because, why not?

I make a huge batch about once a month or so. And it doesn't take much time. You don't have to cook these fruits or veggies before you puree them. It's no different than making a ton of "green smoothies" ... but they don't all have to be green. I end up using whatever leftover fresh fruits and veggies I have "in stock", along with frozen fruits and veggies, and add milk, yogurt, almond milk, applesauce, oatmeal... Whatever!


 Here's what my pouch making station consists of:
  • all fresh fruits and veggies I want to use up
  • half used bags of frozen fruits and veggies I want to get rid of
  • pouch making station and pouches
  • food processor, puree-er, blender
  • yogurt, milk, applesauce, juice
  • towels to cover surfaces because I'm a mess in the kitchen

In about 20 minutes or so I made a full freezer shelf-full (very accurate measurement, I know) of pouches in about 5 different flavor combinations. Here are a couple of the recipes I made today:
(Each "recipe" makes about 5 pouches worth of puree, so multiply as needed!)
  • Green pouch (think green smoothie)
    •  Frozen spinach, 1 whole banana, almond milk, spoonful of Greek yogurt and a handful of frozen mango, 1/2 cup frozen sliced zucchini
  • Purple pouch (very berry smoothie)
    • 1 cup mixed frozen berries (cherries, raspberries and blueberries), almond milk, 1 whole banana, spoonful of Greek yogurt, 1 cup of frozen sliced zucchini
  • Yellow/orange-y pouch (Pumpkin pie smoothie)
    • 1/2 cup pumpkin puree, 1 whole banana, 1 cup applesauce, almond milk, 1 spoon of Greek yogurt, pumpkin pie spice, 1/2 cup chickpeas
Have you ever tried making your own pouch foods? Do you know how much money you could save versus buying the pre-made pouches?

**Disclosure

Saturday, January 24, 2015

5 Recipes - Reviewed by Me!

It's been a while since I've had the time to write up a new post. The boys have started WALKING. Before they even turned 10 months old. I am busier than I ever thought I would be now that they are getting into and onto everything imaginable... or unimaginable... I've also been super busy with work and work-related stuff as well as packing for our first move as a family of 4! I'm not really sure what we were thinking when we committed to moving with babies (toddlers?) 
In between all of those shenanigans, I also picked up reading again. Reading is an on again, off again habit for me. More of a luxury habit, I suppose you could call it because I treat myself to reading a good book. I'm currently working my way through the box set of John Green novels that I received for Christmas. I loved The Fault in Our Stars. Looking for Alaska was good, until the end. I am currently working my way through An Abundance of Katherines - so I'll have to let you know how that one goes.

To add even more fun to my already super busy days, I have been trying really hard to make a new recipe or two each week. For a while there it felt like I was stuck in a rut. Heck, even Andy pulled his cooking skills out of hibernation and cooked two really good meals the other weekend. Here's a couple of recently tried recipes --- reviewed by yours truly.


1.Sweet Potato Chicken Chili - Slow cooker recipe. This was easy (of course!) and delicious... and healthy! The only thing I'm doing differently next time is eliminating the garlic, just as a personal preference. I may double up on the beans and sweet potatoes, nix the chicken and call it a meatless Monday recipe. Andy and I eat entirely too much chicken so I'm trying to find a way to cut back - meats are expensive and there are plenty of less expensive proteins to work with - think beans. 9/10 - will definitely make again.


2. Chicken and Dumplings - Slow cooker recipe.  For those of you expecting "Mom-mom's Noodles" without all the work, you'll be sadly disappointed. However, this recipe was actually REALLY good although different from the noodles I know and love. I will be making it again. I didn't feel like cooking up any vegetables on the side, so I threw in half a bag of baby carrots, whole and some diced celery and called it a day. 8/10 - would make again.

3. Sriracha Lime Chicken Chopped Salad - this was fast, easy and healthy. It was light and filling. Homemade vinaigrette. Mmmm. If you make any of these recipes on this post, make this one for sure! 10/10 - drooling over it and want to make it again.


4. Honey Teriyaki Chicken - This recipe was a flop. A giant, soggy, mushy flop. I added a bag of broccoli to it --- that'd be good, right? Well, no. The sauce never came together. The broccoli got mushy. The chicken had a weird texture from being skillet cooked I think. Nope. Just didn't work. 2/10 - would not make again (but it was still edible.)

5. Chicken Alfredo Baked Ziti  - This is a recipe Andy picked out and made, just for me! He doesn't like pasta or Italian food much at all but he knew that I would like it. I don't ask him to cook much because he gets home from work after 5 p.m. so I like to have food ready for him throughout the week. The weekends is a time for him to at least attempt relaxing so I don't ask him to cook then either... but sometimes I'll ask him to do a load of dishes. This was a really nice to treat to have Italian food cooked for me. The sauce tasted like an Olive Garden copy cat recipe - it was deluxe! It took him a while to make it; we're just going to say it was because he had to dust off his cooking skills. I have it on the menu for me to try this week. 9/10 - making again!
If you try any of these recipes, let me know what you think! If anyone attempts the Chinese food recipe and pulls it off successfully, send me your secrets!

Monday, December 22, 2014

Candy Christmas Trees


"I have SO MUCH FREE TIME!" - said no twin mom ever. Well, I don't have much "free" time (where I'm not on call at a moment's notice) but I do have a fair amount of down time throughout the day... think nap time, when the boys are feeding themselves or playing quietly. So what's a person to do with a whole day at home? Well, I sing a lot. I have semi-one-way conversations with the boys. I crawl around on the floor until my knees are bruised and my back hurts like the Dickens. In between all of that, I do like to do something for me. Whether it's making a nice lunch, sitting on the couch in peace and quiet for 20 minutes, or making something crafty - I need something to keep me sane.

I stumbled upon this idea on, you guessed it, Pinterest. And it looked so easy that I didn't even open the link to the blog. I just went off of what I saw in the picture. I didn't have any of the ingredients or utensils at home already, so we had to make a trip to Target. After my last few escapades to Target, Andy has official banned me from going there alone. I JUST CAN'T HELP MYSELF. It's freaking Turrrget!

What do you need?
  • Wax paper
  • Pretzel rods
  • Green candy melts
  • Plastic Ziploc bag or pastry bag (is that what they're called?)
  • Mini M&M's
  • Festive sprinkles (optional) 
  • Plastic goodie bags (optional)
What do you do?

1. Cover your counter top in wax paper and lay out your pretzel rods, spacing them several inches from each other. 

2. Melt candy melts over a double boiler and then transfer to plastic bag. Cut a very small corner of the plastic bag.

3. Beginning at the top of the pretzel rod, slowly squeeze the candy out of the bag, gradually making a tree shape as you go. Top with M&Ms or sprinkles and let cool completely.

4. I filled (3 per bag is comfortable) little plastic goodie bags with these treats to give to people along with their Christmas presents. We also handed some out at the pediatrician's office and I will be taking a tray to work with me.

Monday, December 15, 2014

Name this baby food!

I am in love with my Crock-pot since the boys made their appearance. I use it at least once a week, maybe more when I'm feeling lazy OR when I want to make a huge batch of delicious, nutritious, homemade baby food. That happens to be what I was using my Crock-pot for today and I would like to note, created this recipe all on my own! Using a Crock-pot isn't exactly neuroscience so I guess it's not that big of an achievement. But I'm still pretty proud of myself.

Chicken, sweet potato, red pepper, apple, brown rice puree.

That's quite a mouthful. Someone come up with a creative name for this deluxe combo! Leave a comment with your suggestion... k thanks!

Ingredients:
  • 1 lb thawed chicken breast in chunks
  • 3 lb sweet potato, peeled and cubed
  • 1 large, sweet apple, in chunks/slices
  • 2 red peppers in chunks
  • 1/2 cup water
  • 2 cups of cooked brown rice (do not add to Crock-pot)
  • Optional seasonings - small amount of salt, black pepper, cumin, garlic, Caribbean Jerk seasoning, go crazy! ... don't really go crazy, though. This is still baby food. 
Directions:


Throw all ingredients, minus the brown rice, into the Crock-pot and cook on low for 6 hours or high for 4 hours. Once everything is cooked thoroughly, puree in batches, adding some of the brown rice. Store in airtight containers for 3 days in the refrigerator or freeze.


Optional: Once you have made smaller batches of this food, try combining new spices that your baby may not have tried yet. We will be adding cumin, black pepper and Caribbean Jerk seasoning in small amounts to see if the boys like spice!

Wednesday, December 3, 2014

What I Ate Wednesday - Slow Cooker Corn and Jalapeño Dip

This recipe was a hit at a pot-luck party we went to a few months back... I made a few changes, of course, but feel free to follow the original recipe found here on Damn Delicious - along with some more beautiful photos! Oh, how I long to be able to photograph food. Or anything, really!

Slow Cooker Corn and Jalapeño Dip 

Ingredients:
  • 4 slices bacon, diced (double this! And don't use turkey bacon like I originally did!)
  • 3 (15.25-ounces) cans whole kernel corn, drained
  • 2 jalapeños, seeded and diced
  • 1/2 cup sour cream
  • 1 cup shredded Pepper Jack cheese 
    • Apparently they don't sell pre-shredded Pepper Jack cheese so you will either need to grate it yourself or substitute... think Monterrey/Colby Jack blend...
  • 1/4 cup grated Parmesan cheese
  • Kosher salt and freshly ground black pepper, to taste
  • 8 ounces cream cheese, cubed (I would only use 6 ounces next time!)
  • 2 tablespoons chopped chives (I left these out because I forgot to buy them. Feel free to add them to yours!)
Instructions:

1. Heat a large skillet over medium high heat. Add bacon and cook until brown and crispy, about 6-8 minutes. Transfer to a paper towel-lined plate; set aside.

2.Place corn (drain it really well, and maybe even dry it if you can so your dip is not as loose(?) is that how it should be described?) jalapeños, sour cream, Pepper Jack cheese and Parmesan into a slow cooker; season with salt and pepper, to taste. Stir until well combined. Top with cream cheese.

3.Cover and cook on low heat for 2 hours.

4.Uncover and stir until cream cheese is well combined. Cover and cook on high heat for an additional 15 minutes.

5. Serve immediately, garnished with bacon and chives, if desired.

I served mine with tortilla chips, but I believe some people just ate it plain, as a side dish. Whatever floats your boat!

Monday, December 1, 2014

S'mores Cookies.

It took me 7 hours to bake one single, solitary, lousy (okay, seriously delicious... not lousy) batch of cookies today. And they were S'mores cookies, too, which means that I was DYING to have one. For 7 hours. How in the world did it take me 7 hours to bake one batch of cookies you ask? I live with short, loud, crazy people. Two of them to be precise. It's two of them to one of me. That's how this horrible story goes...

8 a.m. - The boys are up and happy. Playing downstairs. I decide it will be a FANTASTIC IDEA to make a batch of cookies. I find the recipe I have been drooling over on Pinterest for weeks. I read said recipe... most of the way through. Oh, you have to have softened butter? No biggie. I'll set the butter on the counter to soften while I play with the boys.

9 a.m. - Well, the boys need to take a nap now. Cookies will have to wait a few minutes. I put the boys down in their cribs and get in the shower. Exit shower 10 minutes later. WHY IS SOMEONE STILL AWAKE??? Turns out, not one, but two someones are still awake. I transport babies to their swings to try to squeeze a nap out of them. Desperation begins to set in...

10 a.m. - Everyone is finally sleeping (except me.) Let's make some cookies! I get out all of the ingredients and start measuring them into bowls. Apparently I have to mix the dough with an electric mixer. Can't do that while the boys are asleep! ...I can wait a few minutes until they get up, I guess.

11 a.m. - Ingredients are still sitting in bowls. I am playing with the boys, feeding them, changing their poopy diapers. I honestly forgot about it for a while. Oh! A moment to sneak away and mix the cookie batter!? SURE! Apparently the sound of the hand mixer is terrifying. Cue meltdown from both children. Attempt to comfort them. Fail. Oh well, they can't get any louder now - might as well just finish my mixing. Lovely -- the batter needs to sit in the fridge to "rest" for an hour. I wish I got to rest for an hour. Bitch cookie batter. Just rubbing it all up in my face.

2 p.m. - Yep, I forgot about the batter in the fridge. In the last few hours, I have changed more poopy diapers than a normal person does in a week. I have saved Oliver from having his eyes clawed out by Emmett. They saw snow for the first time through the glass sliding doors! I took 1,000 pictures of them being cute! I got distracted on Facebook with said pictures. Emmett refused nap time. Oliver refused nap time. I made up new words to "All About That Bass" and every Taylor Swift song that has come on Pandora.
S'mores cookies. From The Girl Who Ate Everything

2:30 p.m.  - Why do these kids need fed AGAIN?! Didn't we just.feed.you??? How is it that you have eaten 4 times since I last ate anything? On the plus side, while you eat, I can make cookies! Hold your own bottles, kids! Work for it and earn your keep!

3 p.m.  - Cookies are FINALLY in the oven. I licked the spatula. I ate 2 heaping tablespoons of raw cookie batter. I freaking deserve it. I still haven't had a cookie and it's been 7 hours.

So when Andy gets home today and asks me what I did all day (in the most loving of ways) I will tell him that I made a batch of cookies. And I will be damn proud of my batch of cookies. And I will eat them while staring at a sink full of dishes and a mess of toys all over the floor.


Wednesday, November 26, 2014

What I Ate Wednesday - Crockpot Chicken and Stuffing.

Get the full recipe (and more beautiful photos!) here!
It's been a while since I posted about food! I still love food (more than most things in life) but I've realized I just generally suck at photographing food. If I posted the photos of recipes I've made over the last few months, chances are no one would want to try to recreate that. Sometimes my food looks like a hot mess (along with my kitchen) but the food is always good!

When I came across this recipe on Pinterest (insert your best *gasp* and shocked expression here) I may or may not have literally started salivating. This recipe appeared to be super easy and super dooper right up my alley.

Thanksgiving is my favorite holiday, because food. Yup, because FOOD. Christmas is all fine and dandy, spending time with family and celebrating the holidays and whatnot. But Christmas comes with strings attached - buying presents, wrapping, remembering to bring presents, etc. My birthday is great because it's all about me (and usually includes food from a restaurant of my choice.) BUT THANKSGIVING. It's all about that food, bout that food, food, food.

Now that I realize how easy it is to make this Crockpot knock-off Thanksgiving dinner, I can have my favorite food year round. It's a combination of perfectly cooked, shredded chicken (you could use turkey if you're into authentic turkey-day meals!) perfectly moist and seasoned stuffing and green bean casserole. Make up a batch of instant mashed potatoes or some sweet potatoes and you literally have Turkey Day food in less than 15 minutes.

Swing on over to this site for the full recipe and thank Jennifer from iSave A to Z for this perfect recipe!

Wednesday, October 1, 2014

What I Ate Wednesday - Breakfast Pizza


Follow Oh.em.gee it's Nikkie on Pinterest for more delicious recipes!

This recipe goes along with my meal planning week of breakfast for dinner recipes. It was a hit in our household - Andy has requested it multiple times since then! This breakfast pizza is super easy to make and is filling and (somewhat) nutritious. And, of course, I had to go and throw my own little curve ball at this recipe - sausage gravy as the "sauce." I do not regret that decision at all!

I used to have these little pre-made breakfast pizza things that you would heat up in the toaster oven when I was in school. The calories and fat in those things - my God! After I read the nutritional information, I stopped eating them - typical high school girl, what else would you expect? This recipe is probably a bit healthier for you because: 1. It's homemade. 2. It uses turkey bacon instead of regular bacon. 3. SO MUCH LESS SODIUM. As you know, we're big on cutting back on sodium in this household.

Breakfast Pizza (serves 4)

Ingredients:

  • Sausage Gravy - about a cup... follow this recipe but use non-fat milk and reduced fat meat. Serve it with biscuits earlier in the week and save the leftovers for this recipe (or freeze leftovers!)
  • 1 tube of refrigerated pizza dough
  • 12 ounces turkey bacon
  • 4 eggs
  • 1 cup shredded mozzarella cheese
  • 1 cup shredded cheddar

Instructions:

1. Fully cook and crumble turkey bacon. Set aside. Scramble 4 eggs, adding salt and pepper if you usually do. We do not. Microwave leftover sausage gravy until warm.

This would be delicious baked alone... no need for the extras!


2. Roll out pizza dough. Spread sausage gravy over dough. Evenly coat with bacon, scrambled eggs and top with cheeses. Bake in a 350 degree oven for the length of time noted on the pizza dough container. Seriously it's that easy.

I did mention that this serves 4... people with unusually large appetites, that is!


Wednesday, September 24, 2014

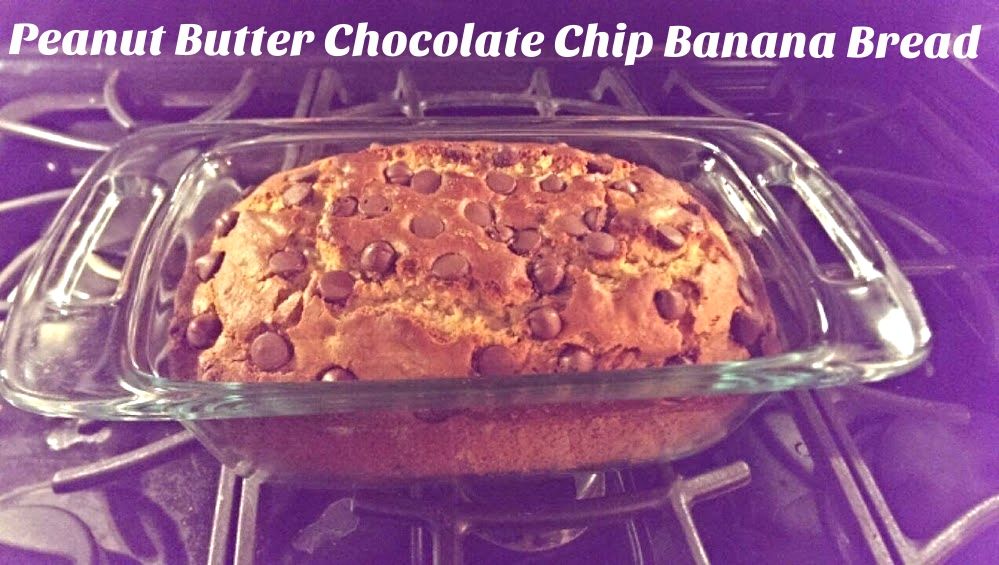
What I Ate Wednesday - Peanut Butter Chocolate Chip Banana Bread

Things I love: Peanut butter, bananas, carbohydrates, chocolate, dessert. This recipe has them all. I've had a copy of this recipe for so long, I don't even know where it came from - but at this point I have it memorized. I mean, I kind of have to have it memorized since I have made this bread, oh, maybe 30 times? Andy doesn't eat it (his loss) so I get it allllll to myself! I'll warm up a slice and have it with a cup of milk for breakfast and/or (usually and) for dessert! It's the only time I willingly drink a cup of plain milk.

Jen recently asked me for a banana bread recipe and she sure did ask the right person. I must have given her 10 different choices in a matter of 2 minutes via text, facebook and Pinterest but she ultimately chose this one and look how beautiful her banana bread turned out!


Pin it! And follow Oh.em.gee it's Nikkie on Pinterest

I introduce to you the ultimate Peanut Butter Chocolate Chip Banana Bread!

Ingredients:

  • 2 cups flour
  • 1 cup sugar
  • 1 Tbs baking powder
  • 1/2 teaspoon salt
  • 1 cup mashed bananas (about 2 medium) --- make sure these are very ripe, with brown spots on them!
  • 1/3 cup milk
  • 1/3 cup peanut butter
  • 3 Tbs vegetable oil 
  • 1 egg
  • 1 cup chocolate chips, divided

Instructions:

1. Preheat oven to 350 degrees (F). Grease a bread pan with a small amount of olive or vegetable oil or nonstick spray. Combine flour, sugar, baking powder in salt in a medium bowl. Combine using a hand mixer: bananas, milk, peanut butter, oil, and egg in a small bowl. Add this mixture to dry ingredients and still until just moistened.

2. Stir in most of the chocolate chips. Pour batter into bread pan and top with the remaining chocolate chips... you can also add chopped nuts if you want to be extra fancy!

3. Bake for 60 minutes. Allow to cool somewhat before you dig in because those melted chocolate chips will burn holes in your tongue if you don't! Serve slightly warm with a large glass of milk. Enjoy!


Wednesday, September 10, 2014

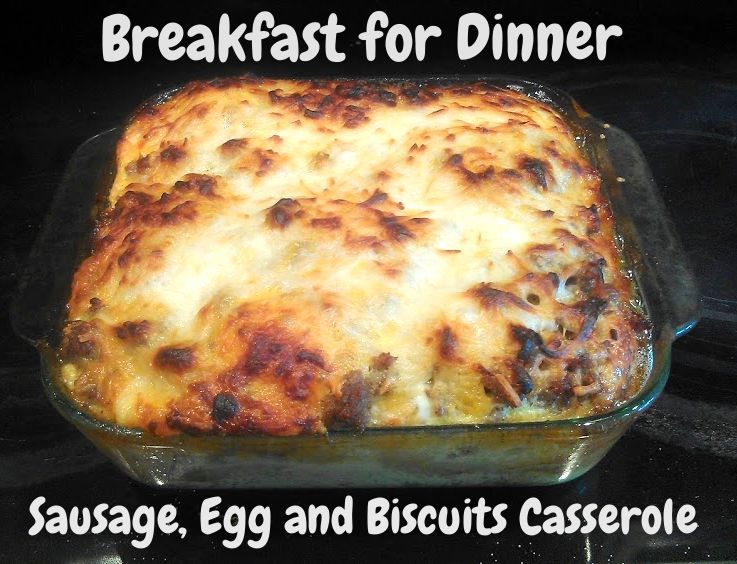
What I Ate Wednesday - Sausage, Egg and Biscuits Casserole


Follow me on Pinterest for more "Breakfast for Dinner" recipes!

I remember the first time Andy said "God, I love you" to me. Well, it wasn't actually the first time - but it was definitely the most sincere time. It was just after I had told him that our meal plan for the week was "breakfast for dinner" themed and then told him the 3 recipes I was planning on trying. I apparently made his entire week - with just a few key words... breakfast. for. dinner. We have been married for 5 years and I have never once done this theme because I generally don't like breakfast. But I finally found enough recipes that I thought I may tolerate to give it a try and it's soooo worth it.

Our weekly grocery shopping trip was actually less expensive this week because, who knew, breakfast ingredients are less expensive! We purchased 18 eggs for about $3 and eggs happened to be the main focus in most of the recipes. Cheap food, happy husband - WINNING! Sorry for that reference, I had to.

Here is the first of the breakfast for dinner recipes I tried. It's a Sausage, Egg and Biscuits Casserole - I didn't and wouldn't change a thing. That's probably the only time you'll ever hear me say that - so bookmark it!

Sausage, Egg and Biscuits Casserole - found on MyRecipes.com

Ingredients:

  • 1 package refrigerated buttermilk biscuits
  • 1 lb Jimmy Dean breakfast sausage (we used pork)
  • 6 eggs
  • 3/4 cup milk
  • 1 cup shredded cheddar cheese
  • 1 cup shredded mozzarella cheese
  • Salt and pepper 

That's it. I didn't say it was healthy, though.

Instructions:

1. Tear the biscuits into pieces and spread over the bottom of an 8x8 greased casserole dish. Brown sausage and spread evenly over top of the biscuits. Beat eggs with the milk, salt and pepper and pour over the sausage. Cover with the shredded cheddar and mozzarella cheeses.

2. Bake at 425 for about 30-35 minutes. Let sit for 5 minutes to let the casserole firm up.

3. Enjoy the love, praise and affection that your husband will shower you with because you are now his favorite person in the world, if you weren't already.


Friday, September 5, 2014

Meal Planning Basics - Mexican Week!


Follow Oh.em.gee it's Nikkie on Facebook so you never miss a post!

Meal planning: this is oh.so.important! Meal planning keeps me somewhat sane during the week and keeps me from wondering "What's for dinner? Lunch? Do we even have any food?" daily! On Sundays, I sit down and plan out a full week's worth of meals and make a comprehensive grocery list. I say comprehensive because I CANNOT forget anything. There is no such thing as a quick trip to the store for that forgotten item anymore... not with twin babies.

Does it sound overwhelming? It's not. It's actually really easy!

What if you're not hungry when you sit down to meal plan? Pinterest can fix that in about 3 seconds. I keep a running tab of recipes I've tried and like on this board on Pinterest so I can always refer to those if I am stuck in a rut in addition to those recipes that you just know - like the spaghetti and meatballs, grilled cheese, and chicken noodle soup-type recipes that everyone has stored in their brains somewhere. You know the ones. 

Meal planning has saved me time, money, frustration... you name it! It's totally worth taking the time each Sunday to plan, grocery shop, and prepare meals for the week.

Here are some meal planning life-simplifying tips:

1. Keep a running tab of recipes that you can refer back to so that you are not constantly having to think of recipes. I utilize Pinterest for this, but you could go old-school and keep a notebook or folder, too!

2. Pick a theme for the week. Whatever it is, make sure that the ingredients overlap a bit so food is not going to waste and you don't have to do a full grocery shopping trip every week! A little variation in themed recipes can go a long way. Need themes?

  • Mexican
  • Italian
  • Chinese
  • Thai
  • Salads
  • Breakfast for Dinner
  • Vegetarian
  • Americana

There's 2 months worth of themed week ideas for you right there... You're welcome.

3. Pick foods that re-heat well. This is especially important for any lunches that you will be making ahead of time. Soups, pasta dishes, crock pot meals, casseroles, etc. all re-heat well! If it won't stay good in the fridge, find a way to freeze it. Almost anything can and should be frozen.

4. Don't forget dessert. I am so guilty of this one. I never remember to make a dessert on Sunday and then I get hangry for dessert. You don't want to meet me when I'm hangry... I closely resemble someone in a Snickers commercial. Which makes for one. grouchy. mama. Seriously, don't forget it!


5. Plan to have meals with recipes that call for fresh foods earlier in the week. So this means if you have the choice between scheduling a taco salad, tacos, or a crock pot burrito bowl recipe for Monday - go for the taco salad first! Ain't nobody got time fo' limp salad or not so crisp veggies due to poor meal planning!

Once you have a list of recipes that you want to make for the week, WRITE IT OUT. Your husband will stop asking you what you're planning for dinner.Your husband may even call you out on it when you want to get take out or have leftovers for dinner because "WEREN'T WE SUPPOSED TO HAVE PIZZA POPPERS???"


Stuck in a recipe rut? Here is a sample meal plan from this past week with links to the recipes (Again, you can thank me later!)
 
 Mexican Themed Week - all of these recipes have been test-tasted and approved by me... and Andy!

These recipes all call for the same handful of ingredients but they can be used in so many different ways, you won't even feel like you're eating the same thing all week! All of these recipes also make great leftovers - I live off of leftovers for lunches, so I would know. 

A simple piece of paper works for my purposes of keeping track of what we're eating, but there are tons of meal planning print-ables on Pinterest! Maybe one day I will get crafty and make a bulletin board or something... ha. Me? Crafty? Nope. Nope nope nope.

What go-to recipes do you use? What are some meal planning tips that you use for your family? I'm interested to hear what works for you - and what doesn't!

Wednesday, September 3, 2014

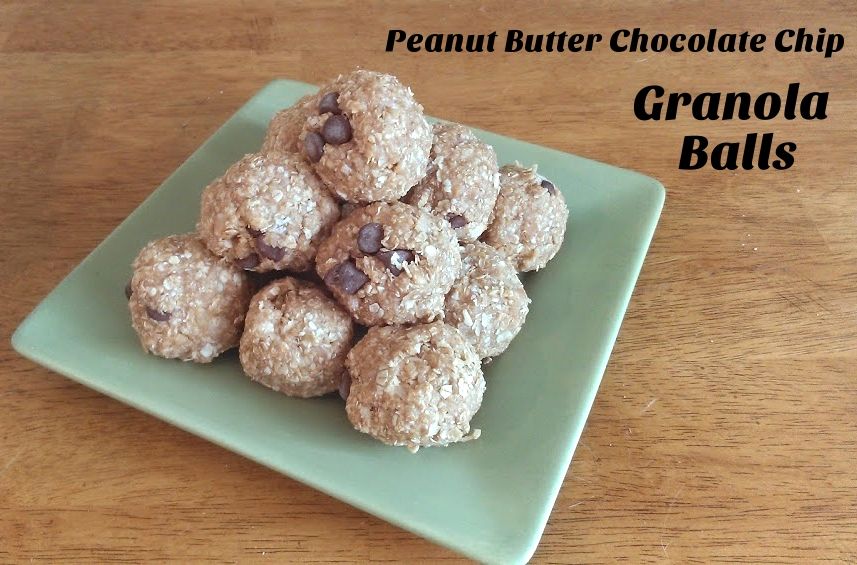
What I Ate Wednesday - Homemade Granola BALLS

Follow me on Pinterest and Facebook for more recipes!

Thought I said granola bars, right? Nope. Granola balls. I think they're better, personally. They're more moist than the bars and super peanut-buttery and delicious.

I read a recipe for these from Baked in Arizona and, of course, I had to alter it and make it my own. I now make these and/or homemade granola bars every week for Andy to take to work and me to snack on. They're good enough that I'm considering making a TON, freezing them, and giving them out as Christmas presents! Who wouldn't love a homemade snack?

You can do whatever variety you want, but I usually make peanut butter chocolate chip. Doesn't get much less original than that, sorry. But I promise you won't be disappointed by them!

The main changes I made from the original recipe are to eliminate the ground flaxseed (I don't even know what it is, to be quite honest!) and to use less honey because that stuff is expensive!

Homemade Peanut Butter Chocolate Chip Granola BALLS (Makes about 18)


So easy, a caveman could do it. Did I just date myself?

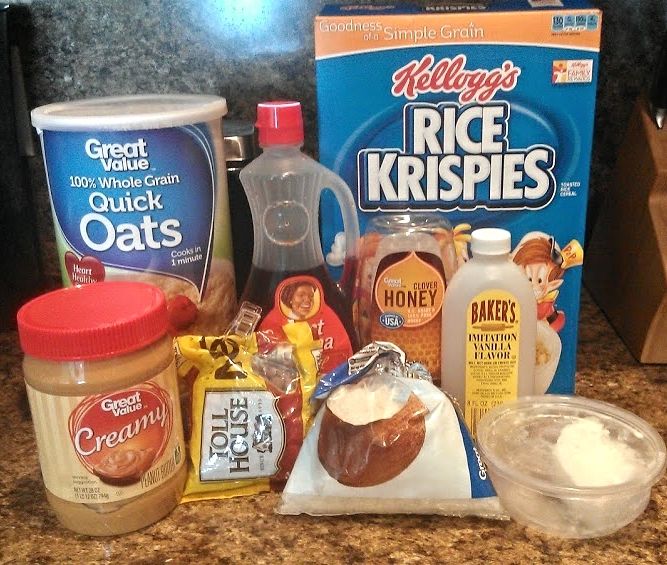
Ingredients:

  • 3 cups quick oats
  • 1 cup crispy rice cereal
  • 1/2 cup unsweetened shredded coconut
  • 1 cup peanut butter
  • 2 tsp vanilla extract
  • 1/2 cup light maple syrup
  • A heavy drizzle (maybe 1/8 cup?) honey
  • 1/2 cup mini chocolate chips
  • 2 tbs coconut oil

Instructions:

Add all ingredients to a large mixing bowl. WASH YOUR HANDS. Mix all ingredients by hand until thoroughly combined. Roll into golf-ball sized balls. Refrigerate for 30 minutes. Wrap in saran wrap, store in air-tight container or stuff them all in your face immediately. 

Eat responsibly.

Wednesday, August 27, 2014

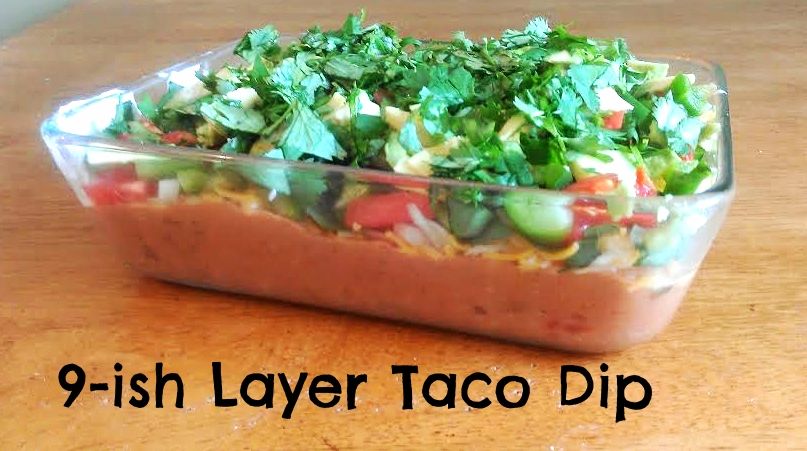
What I Ate Wednesday - 9-ish Layer Taco Dip


Follow me on Pinterest for more delicious recipes!

So, if we're being technical here, this is actually more of a 9-layer Taco Dip instead of your traditional 7 layer. Why not? I wanted a mexican-type dish to take to a party (my birthday party, to be precise) and I wanted to make something new so... this is what I came up with! After reading through about 5 different 7-layer dip recipes and taking inventory of the ingredients I had on hand, I now present to you the 9-ish layer dip. The -ish comes about because you could combine some of these ingredients to make a salsa or guacamole and use them in that fashion. But I didn't, because this was easier. 

This dip is served cool or room temperature - you don't want to heat this after it is prepared because it will wilt your lettuce and crisp veggies - plus, it's an extra step you don't need to take. 

If you only take away one thing from this recipe to use in your own rendition of a 7-layer dip, please make it this: for the LOVE OF GOD do not just open a can of re-fried beans and put them on a platter. PLEASE. Thanks in advance. Life lesson: cold, straight out of a can re-fried beans are not something you want to serve at a party. I'll go as far as to say your friends will hate you. They may even leave. And then you don't have a party anymore. And you won't have any dip because they will burn it. Slightly dramatic? Maybe. But you have been warned.


9-ish Layer Taco Dip

Ingredients:

  • 1 can re-fried beans
  • 1/2 jar of salsa
  • 1 tsp of cumin
  • 6 oz sour cream
  • 1 cup taco blend cheese
  • 1/4 diced white onion
  • Handful (very precise measurement) of shredded romaine lettuce
  • 1 diced tomato (if you don't have any ripe, home-grown ones available, store-bought will do. Silly Ina Garten.)
  • 1/2 diced green pepper
  • 1 diced avocado
  • Handful of chopped cilanto

Instructions:

1. DO NOT SKIP THIS STEP. See the above reasons for why you need to do this. Heat your canned, re-fried beans over medium heat. Add 1/2 jar of salsa and the cumin. Stir and heat through. This will transform your beans. People may even question if you made them yourself.

2. Spread beans on the bottom layer of whatever serving dish/tray you want to use. Top with the sour cream. Spread the mexican blend cheese on top. Add diced onion, tomato, green pepper in any order you want. Go crazy. Let loose.

3. Top with shredded lettuce, avocado and cilantro. Cover and refrigerate until chilled or serve immediately with tortilla chips.

Wednesday, August 20, 2014

What I Ate Wednesday - Fried Ice Cream


WARNING: This recipe is DANGEROUS. For your diet! Haha. But seriously, I have made this recipe multiple times now and people literally devour it. Which is good, because I definitely don't need to have the leftovers in my house for me to eat nonstop.

This recipe for Fried Ice Cream Cake comes from one of my favorite food blogs, South Your Mouth.  The first time I made this recipe, I followed it exactly. Which is exceptionally rare for me! I thought fried ice cream was something super complicated to make and time consuming as well - but I was wrong! Go figure. I would have started making it years ago if I knew... I may also weigh 400 pounds if I had.

The second time I made this recipe, and for subsequent makings, I made a few slight changes just because. I crave the need to make a recipe my own almost as much as I crave fried ice cream. (That's A LOT, by the way.)

Fried Ice Cream Cake (serves 12-ish big portions or 20-ish normal portions...)

Ingredients:

  • 1 stick of unsalted butter
  • 1 cup of sugar
  • 4 cups of crushed cornflakes
  • 1 teaspoon salt
  • 2 tablespoons honey
  • 1 quart of vanilla ice cream (MUST be real vanilla, not vanilla bean. Must be REAL ice cream, no fro-yo or other shenanigans.)
  • 1  8-oz container of cool whip, thawed (regular, not low-fat)
  • 2 teaspoons cinnamon
  • Extra honey for drizzling - you could also use chocolate syrup if you're that kind of person...

Instructions:

1. Set ice cream and cool whip out on the counter to thaw a bit (very specific amount of time here... do not mess this up!) while you work on the crispies.

2. Melt butter in saucepan over medium heat. Add sugar and salt. Heat and stir until mixture bubbles slightly. Add cornflakes and continue to stir and cook until cornflakes achieve a beautiful golden brown crispiness. Add 2 tablespoons of honey. Set aside to cool or spread 2/3 of the mixture in the bottom of a 9 x 13 pan to cool. Try not to eat all of it.

3. In a large mixing bowl, combine ice cream, cool whip, and cinnamon with a hand mixer just until thoroughly combined. Spread ice cream mixture on top of the cornflakes evenly. Spread the remaining cornflakes on top. Cover and put in the freezer overnight.

4. Pull out of the freezer about 15 minutes before you want to serve. Drizzle with honey prior to serving. Enjoy, and try not to eat it all on your own!

Wednesday, August 6, 2014

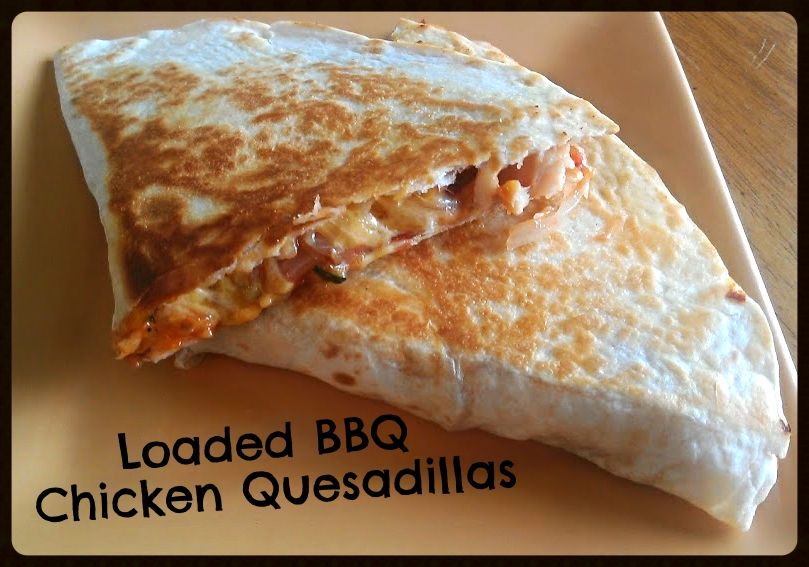
What I Ate Wednesday - Loaded BBQ Chicken Quesadillas


I'm always trying to sneak vegetables into Andy. It's been working out in my favor for years now - some of the time he doesn't even realize it. Sometimes he has a feeling that he's eating vegetables but he doesn't know how I got them in there. Sometimes he can just plain see them. Since he's the pickier eater (I don't like to use that word in this household... the boys WILL NOT be picky eaters. I refuse!) I like to start with a dish that I know he likes. Then I figure out a way to make it healthier - add vegetables, lower the sodium, sneak in some whole grains or Greek yogurt. The usual.

Today I started out with a BBQ Chicken Quesadilla. Can't complain there, right? Well, in getting out the ingredients to make said quesadillas, I came across some fresh foods in the fridge that really needed to be used. I hate it when fresh stuff goes to waste. In essence, this recipe came about as a way to clean out my fridge. But the results were quite delicious. The original quesadilla would have been fine, but I made a gourmet, flavor punched up version that Andy couldn't even complain about. How many vegetables can I fit into one quesadilla? Challenge accepted.

Loaded BBQ Chicken Quesadillas (makes 2)

Ingredients:

  • 2 twelve inch flour tortillas
  • 1 chicken breast, cut into bite-size pieces
  • 1/4 of a white onion, cut into thin strips
  • 1/4 cup of zucchini, shredded or diced into small pieces
  • 1 Roma tomato, diced
  • 1 jalepeno, finely diced
  • Handful (very precise!) of cilantro, roughly chopped
  • Favorite BBQ sauce
  • 1 cup of shredded cheddar cheese (could also use pepper jack, Mexican blend, anything really!)
  • 1 tablespoon butter or margarine

Instructions:

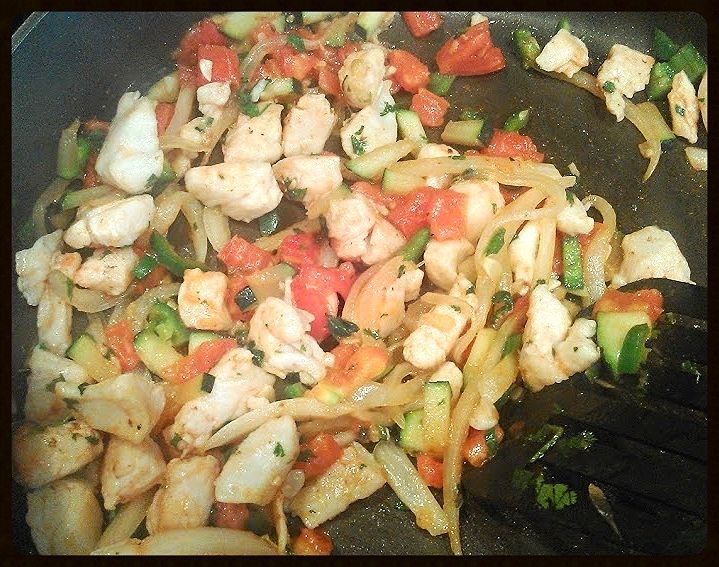
1. Saute chicken, onion and zucchini for about 7 minutes or until chicken is fully cooked and onions have started to brown. Add the tomato, cilantro and jalepeno. Cook until hot.

So many veggies!

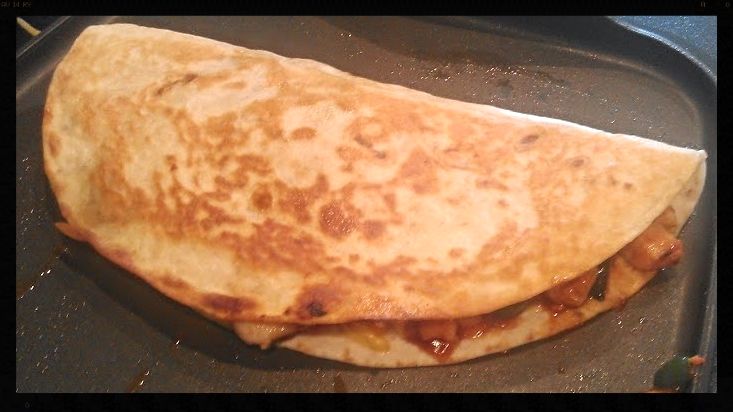
2. Divide mixture equally between two tortillas. Add desired amount of BBQ sauce on top. Evenly divide the cheese. Fold in half.


3. Add small amount of butter or margarine to a griddle. Cook quesadilla until golden brown. Flip and cook until the other side is golden brown. Set aside on a plate to cool for a moment before cutting (cheese, sauce and goodness need to set or the fillings will all spill out) Cut in half and enjoy!


Wednesday, July 30, 2014

What I Ate Wednesday - Mexican Stuffed Peppers

I have never made stuffed peppers before. I wasn't sure if I would like that.much.pepper. and I figured Andy would politely decline... or maybe not so much politely as just decline. I stumbled upon a photo on Pinterest (me? on Pinterest? NEVER!) that just looked soooo delicious and I somehow had all the ingredients on hand. So I made stuffed peppers. And they were delicious. I also found out you can make them ahead of time, freeze and then just pop in the oven - I LOVE those kind of recipes - you probably would have never guessed, I'm sure.

Follow me on Pinterest for more easy recipes!

Andy was recently diagnosed (I accidentally typed dx here... too much time in the medical field! Gah.) with high blood pressure. He ASKED me to help him manage his diet to help his blood pressure. Something I never thought he would ask, ever! He agreed to eat whatever I would make him. These last two weeks have been fun for sure! So many vegetables. So much healthy! So little salt. These Mexican stuffed peppers met all the requirements.

Mexican Stuffed Peppers (serves two)

Ingredients:

  • 2 Green bell peppers
  • 1 cup cooked rice
  • 1/4 cup corn
  • 1/4 cup black beans
  • 1 tbs taco seasoning
  • 1/2 jar of salsa
  • 1/2 cup water, divided
  • 1/4 cup shredded cheddar or pepper jack cheese
  • 1/2 lb ground turkey
  • 1/2 small yellow or white onion


Instructions:

1. Saute ground turkey and diced onion in a skillet until turkey is fully cooked. Add 1/4 cup of water and the taco seasoning and let simmer until no water remains. Add cooked rice, corn, black beans and salsa and cook until heated through.

2. Slice tops off green peppers and clean out seeds and "that white stuff"  - pretty sure they're called membranes but that word sounds disgusting. Stuff peppers (hence the name...) with the taco mixture and place in a baking dish with 1/4 cup of water. Cover with aluminum foil and bake at 400 degrees for 40 minutes.

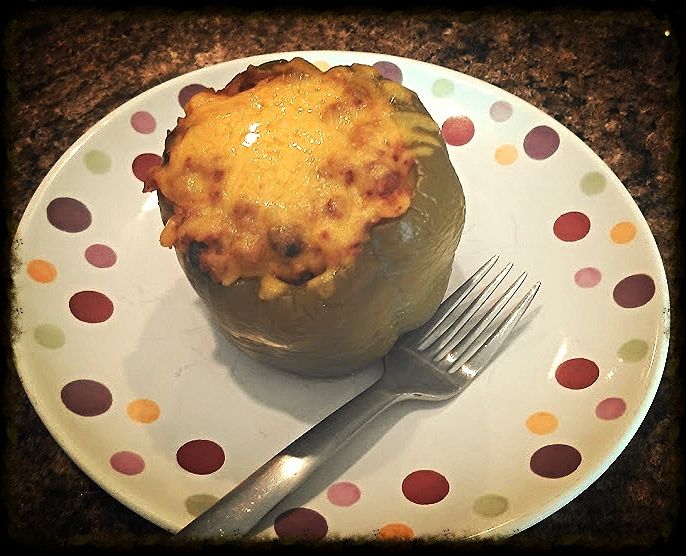
3. Remove from oven and uncover. Top with shredded cheese and return to oven, uncovered for 10 more minutes. When done, remove from water and let cool. These things will burn your tongue off if you dive right in. No jokes here.

This recipe can be multiplied easily for a large crowd. Can also be made ahead of time (stop before putting in the baking dish and cooking), wrapped in foil or plastic wrap and frozen.

Friday, July 25, 2014

Pregnancy To-do List: Stock Your Freezer!


One of the smartest things I did while pregnant was think ahead. About food. Because I'm almost always thinking about food anyway. When would I have time to cook once the babies were here? Would we starve? Would Andy cook all the time? Nope nope nope! We were going to have a freezer stash full of healthy and already prepared foods - I was determined! 

I made sure to look up recipes and make my grocery list well ahead of time although I didn't actually cook everything and assemble the freezer meals until about a month beforehand. I was somewhat afraid I would eat it all and then have to start from square one. It's something I would definitely do - I know me pretty well! 

 I knew that it would be a weird transition for me to be home at nights and needing to have food figured out for when Andy got home from work. My work schedule has always been evenings so dinner every day of the week is just something I've never done. You can't eat pizza every night! Or can you?

I chose 5 recipes to cook/assemble and it took us about 3 months to use up all of the freezer food. Now I'm starting to make some of the recipes again to have on hand for busy weeks. Andy even requested some of them so you know they were a hit!

1. Slow Cooker Cheesy Chicken and Rice  I had made this recipe before and knew that I wanted it on my list right from the beginning. It's easy, filling and has a lot of protein, which you need as a preggy person and probably after being preggy as well. It makes a lot of food which I then put into individual meal containers and froze.

2. Pasta Fagioli Soup (an Olive Garden copycat - Recipe below!) My mom has made this for years and I got the recipe from her. I have no idea where she found it but it is IDENTICAL to the soup they serve at Olive Garden. Once again, it makes a huge batch. I filled Ziploc quart sized bags with the cooled soup and froze (laying flat in the freezer so they didn't take up much room)

3. White Chicken Chili  This is the recipe I wasn't too fond of. I'm not sure if it was just because it was frozen or if it's just not as good as the recipe that's been hanging around my family for years but I would skip this one next time (Ha! Next time!... NO.)

Love the serving suggestion... tortilla chips, sour cream and cilantro! Yum!


 4. Crock Pot BBQ Chicken (served over white rice) This recipe is nice because you literally throw all of the ingredients into a Ziploc bag and freeze for the prep! When it comes time to cook, you pull it out of the freezer the night before and then dump in the crock pot in the morning. Hot, delicious meals ready without any fuss.

5. Crock Pot Teriyaki Chicken (served over white rice) Equally as delicious as the BBQ chicken and just as easy. This was Andy's favorite out of the make-ahead meals!

So easy! Follow me on Pinterest for more easy meals!


 In hind-sight, I would double the amount for the BBQ Chicken and Teriyaki Chicken recipes because they were SO easy and now I'm hungry for them again!

Start planning your make-ahead and freezer stash meals early - you never know if your babies will be early (like mine!) You WILL be hungry, and probably exhausted too!

Olive Garden Pasta Fagioli 


Ingredients:

  • 1/2 cup water, divided 
  • 1 lb extra lean ground beef 
  • 1 cup onion chopped 
  • 1 cup carrots slivered 
  • 1 cup celery diced 
  • 2 14 1/2 oz cans of petite diced tomatoes 
  • 1 14 1/2 oz can red kidney beans 
  • 1 14 1/2 oz can white beans like northern or navy 
  • 5 1/2 cups of beef broth 2 tsp oregano 
  • 1 1/2 tsp ground black pepper 
  • 1 T parsley 
  • 1 tsp Tabasco sauce 
  • 32 oz spaghetti sauce 
  • 4 oz dry ditalini or small shell pasta 

Instructions:
Saute beef in 1/4 cup water in a large pot until the beef starts to brown. Drain. Add 1/4 cup water, onions, carrots, celery and tomatoes and simmer for about 10 minutes. Drain and rinse beans and add to pot. Add beef broth, oregano, pepper, parsley, tabasco, spaghetti sauce and noodles. Simmer until carrots and celery are tender or about 45 minutes.
This makes about 5 qts of soup or 12 servings. Make one day ahead for the best flavor. Can freeze!

Happy nesting! (Does this count as nesting??? I feel like it does!)

Wednesday, July 23, 2014

What I Ate Wednesday - Homemade Peanut Butter Granola Bars


Follow me on Pinterest for more tested and approved recipes!

Saying that Andy eats a lot of granola bars would be an understatement. It's more like a butt-ton (a personal favorite unit of measurement) of granola bars. Every morning for breakfast. And he can eat 2 of them without being even close to satisfied. So, me being me, got tired of spending lots of money on granola bars and wanted to try to make them on my own. And it has to be healthier, right???

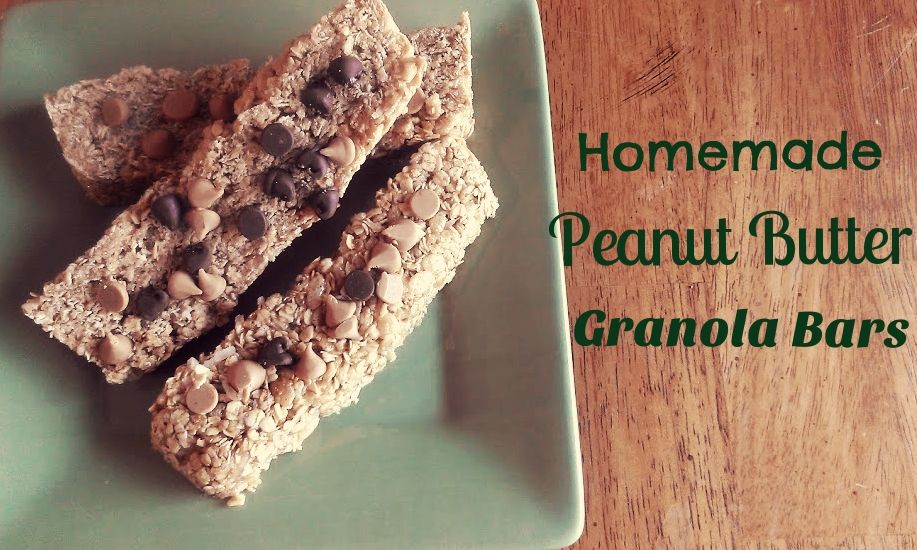
I followed this recipe for no-bake granola bars and it was easy and fast! As usual, I didn't exactly follow the directions and I definitely didn't measure anything... so here is my interpretation of the recipe! It made 5 large (I'm talking probably 3 times the size of a store-bought one) granola bars and Andy has approved this recipe!

Ingredients:

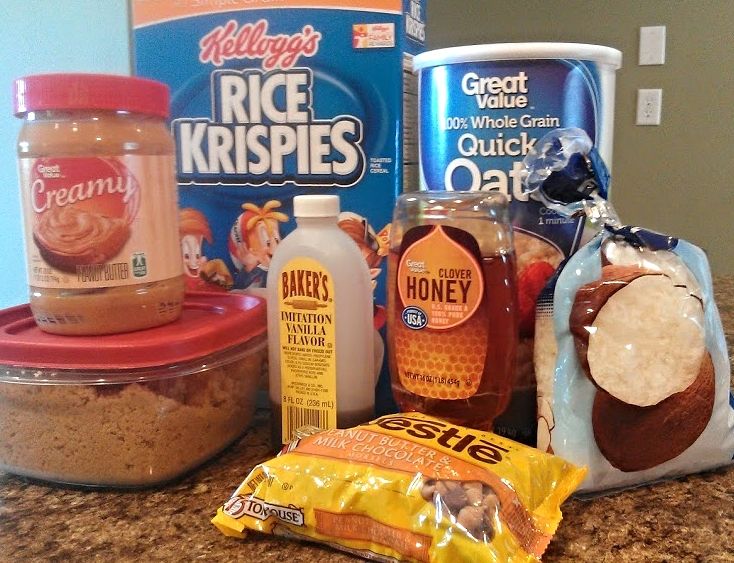
  • 2 cups quick cooking oats
  • 1 cup Rice Krispies
  • 1/4 cup shredded coconut
  • 1/2 stick of unsalted butter (I plan to use 1/2 of that amount next time to cut back on calories)
  • 1/4 cup honey (I may use maple syrup in the next batch - honey is expensive!)
  • 1/2 cup light brown sugar
  • 1/2 tsp salt (original recipe called for this but I left it out)
  • 1/2 tsp vanilla
  • 2 tbs peanut butter
  • 1/4 cup mini chocolate chips
Instructions:

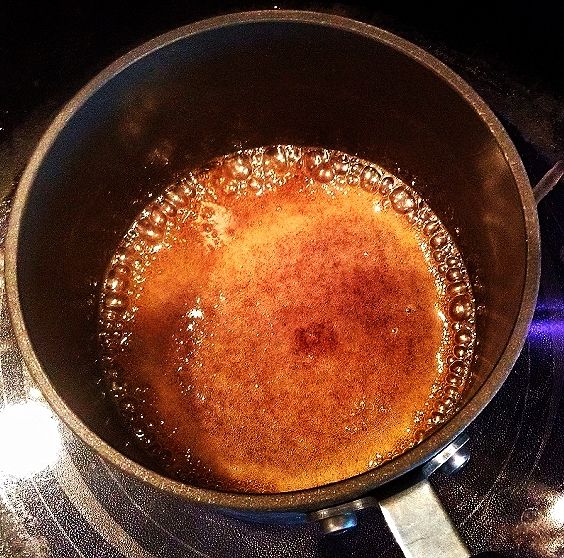
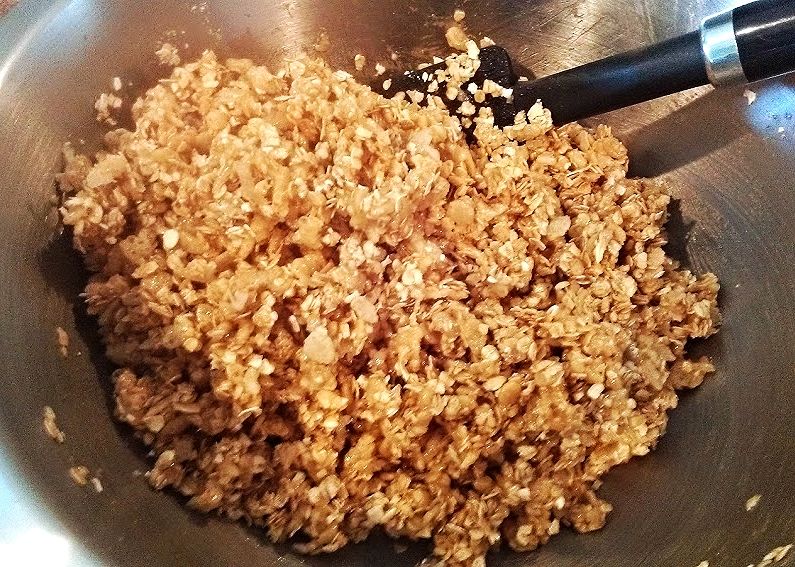
1.  In a large mixing bowl, mix together the oats, cereal and coconut.  Set a small saucepan over medium high heat and melt the butter.  Add the honey, brown sugar (and salt if you wish). Stir together then leave it alone as it comes to a boil.  Once the boil has reached all the way around the edges of the pan, begin timing.  Allow this mixture to boil for 2 minutes and 15 seconds. (I only did 90 seconds because it got out of control - my bad.) Add the peanut butter at the end of this and stir in completely.

Heat that deliciousness to a rolling boil - but keep an eye on it!

2.  Pour the mixture over the oats. Mix the ingredients together until the oats are completely coated.  Let cool before adding chocolate chips.

Mix it all together - you're almost done... already!


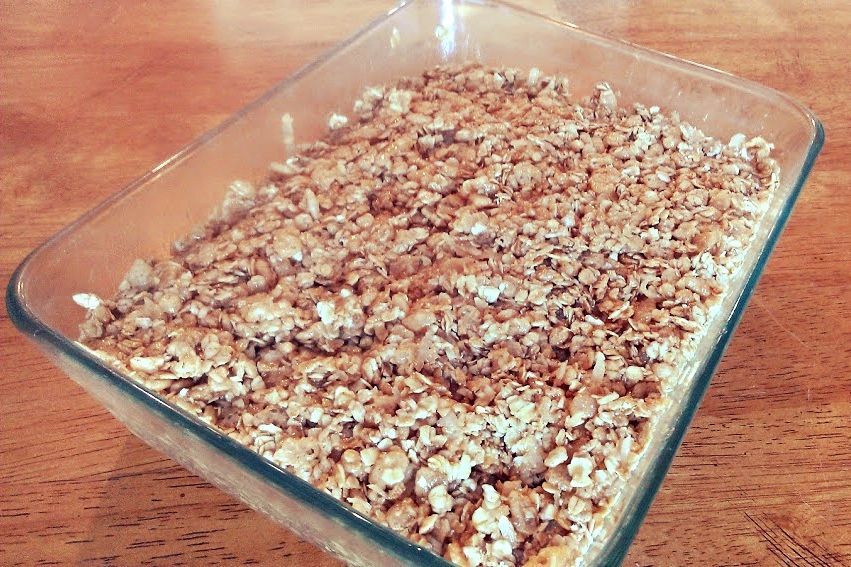
3. Press very firmly into a lightly greased pan. (The original recipe calls for a 9x13 pan but I used one about 1/3 the size of that because I wanted super thick bars)  If you do not press firmly enough, the bars will fall apart when you eat them.  Place them in the fridge for 20 minutes then cut to size. You can add additional toppings at this point and then wrap in saran wrap or store in re-useable containers. Enjoy!

Feel free to go crazy with the toppings! Or just leave them plain... your choice!


Total cost: I'm not really sure because I only had to purchase the oats and Rice Krispies - everything else I had on hand! But it sure does feel a lot less expensive than buying 2 or more boxes of granola bars a week!

Variations I plan on trying: Pumpkin pie, white chocolate, dark chocolate and almonds, dried berry, candy bar, maple bacon! I'll let you know how it works out!

Check out additional variations via the original posting on Made From Pinterest!

Friday, July 18, 2014

Keeping it Simple with Homemade Taco Seasoning

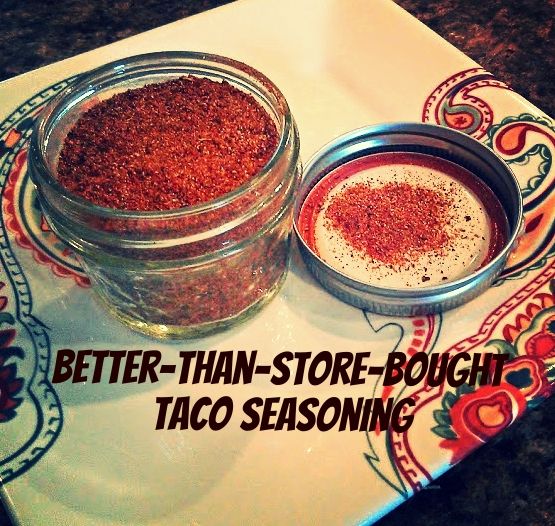
Have your dinner plans ever been knocked down because you ran out of taco seasoning? For some reason I could never keep taco seasoning stocked in my cabinets... I'm not sure if we just went through it so quickly or I kept forgetting to buy it but I never had any! It was a very frustrating predicament to have especially when I went through the effort of meal planning and then had to deviate. Well, a few weeks ago I decided enough was enough and I raided my spice cabinet and made my own taco seasoning. It was delicious. I will never go back to the packaged, processed, extra salty stuff ever again.

Follow me on Pinterest for more delicious recipes!

I made a quadruple batch of this recipe that I found on Pinterest and I store it in a little mason jar. So cute! So thrifty! So delicious! I found out that I already had almost all of the ingredients in my cabinet so I only needed to buy one additional seasoning the next time I went to the store. I have used about a tablespoon for each 1/2 pound of ground turkey that I make (the heck with ground beef, we love ground turkey in the household!)

Try it for yourself and see what you think!

Ingredients: (for 1 oz.) I quadruple this so I can have some ready at all times!
  • 1 tablespoon chili powder
  • 1/4 teaspoon garlic powder
  • 1/4 teaspoon onion powder
  • 1/4 teaspoon crushed red pepper flakes - (I may or may not have used a tad extra... Hint: I did.)
  • 1/4 teaspoon dried oregano
  • 1/2 teaspoon paprika
  • 1 1/2 teaspoons ground cumin
  • 1 teaspoon sea salt (I skip the salt completely... it doesn't need it!)
  • 1 teaspoon black pepper

Instructions: You literally combine all ingredients in a small bowl and store in an air-tight container. Yay!

Fun fact! I used this taco mixture to season the ground turkey for the $2 Taco Salad!

Wednesday, July 16, 2014

What I Ate Wednesday - Buffalo Chicken Salad

 Buffalo... Chicken. Salad! It's what's for dinner.
I like to make at least one salad a week for dinner. Because it's healthy. Because it's maybe the only vegetables I will get Andy to eat all week. Mostly because I personally love salads - really good salads! I also love buffalo chicken... anything - dip, sandwiches, wraps, pasta  - if it's buffalo chicken flavored, I'll eat it. Probably. Let's not get carried away here. Here is my recipe for an easy buffalo chicken salad. Do the prep work once on Sunday and you can eat it for lunch every day for a week! 

 Buffalo Chicken Salad

Ingredients:

  • 4 Breaded chicken tenders - we use Tyson brand
  • 1/4 cup Frank's hot sauce
  • 1 head of Romaine lettuce
  • 1 cup shredded mozzarella cheese
  • Handful of cherry tomatoes
  • Blue cheese crumbles
  • Blue cheese or ranch dressing
  • Croutons (optional)

Instructions:

1. Chop, rinse and dry lettuce. Using a salad spinner is super helpful and I think it keeps our leftover lettuce fresher for longer.

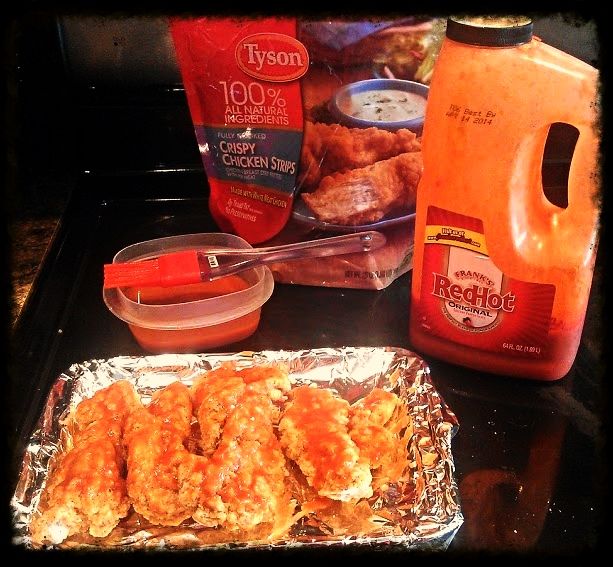
Why yes, we do buy our hot sauce by the gallon.


2. Place chicken tenders on a lined toaster oven tray or baking sheet (we use the toaster oven for this... I think it's faster!) Spread hot sauce on top side and bake using instructions on the bag for about 1/2 of the time. Flip half way and spread other side of the tenders with the hot sauce. Cook until outside is crisp. Let cool for a few minutes and then give them a rough chop.

3. Assemble your salad - lettuce, mozzarella cheese, diced or halved cherry tomatoes, blue cheese crumbles, chopped buffalo chicken. Serve with blue cheese or ranch dressing on top or on the side, if you're like me.


Enjoy!