Wednesday, July 30, 2014

What I Ate Wednesday - Mexican Stuffed Peppers

I have never made stuffed peppers before. I wasn't sure if I would like that.much.pepper. and I figured Andy would politely decline... or maybe not so much politely as just decline. I stumbled upon a photo on Pinterest (me? on Pinterest? NEVER!) that just looked soooo delicious and I somehow had all the ingredients on hand. So I made stuffed peppers. And they were delicious. I also found out you can make them ahead of time, freeze and then just pop in the oven - I LOVE those kind of recipes - you probably would have never guessed, I'm sure.

Follow me on Pinterest for more easy recipes!

Andy was recently diagnosed (I accidentally typed dx here... too much time in the medical field! Gah.) with high blood pressure. He ASKED me to help him manage his diet to help his blood pressure. Something I never thought he would ask, ever! He agreed to eat whatever I would make him. These last two weeks have been fun for sure! So many vegetables. So much healthy! So little salt. These Mexican stuffed peppers met all the requirements.

Mexican Stuffed Peppers (serves two)

Ingredients:

  • 2 Green bell peppers
  • 1 cup cooked rice
  • 1/4 cup corn
  • 1/4 cup black beans
  • 1 tbs taco seasoning
  • 1/2 jar of salsa
  • 1/2 cup water, divided
  • 1/4 cup shredded cheddar or pepper jack cheese
  • 1/2 lb ground turkey
  • 1/2 small yellow or white onion


Instructions:

1. Saute ground turkey and diced onion in a skillet until turkey is fully cooked. Add 1/4 cup of water and the taco seasoning and let simmer until no water remains. Add cooked rice, corn, black beans and salsa and cook until heated through.

2. Slice tops off green peppers and clean out seeds and "that white stuff"  - pretty sure they're called membranes but that word sounds disgusting. Stuff peppers (hence the name...) with the taco mixture and place in a baking dish with 1/4 cup of water. Cover with aluminum foil and bake at 400 degrees for 40 minutes.

3. Remove from oven and uncover. Top with shredded cheese and return to oven, uncovered for 10 more minutes. When done, remove from water and let cool. These things will burn your tongue off if you dive right in. No jokes here.

This recipe can be multiplied easily for a large crowd. Can also be made ahead of time (stop before putting in the baking dish and cooking), wrapped in foil or plastic wrap and frozen.

Monday, July 28, 2014

Daily Schedule for Twins at 18 Weeks


The boys are 18 weeks old already. Sweet baby Jesus and Mother of Pearl. I don't even know when it happened. They are such little adults already though! We have our day-to-day schedule down. They know what to expect. I know what to expect. We have happily fallen into a routine. If you haven't found your niche-schedule yet, I feel sorry for you... how do you live???

The outline of their daily schedule is pretty similar to what it was on my previous post of life with twins at 14 weeks except playtime is much much much more interactive and lasts a bit longer. Afternoon naps are a little shorter and, best things last, bedtime is a little earlier! Andy and I have free time to ourselves between the time that the boys go to bed and our bedtime now - and that small amount of child-free time is glorious. You will get there too, ducklings, all in good time.

Here is a sample outline of their schedule. As you know, I'm flexible - none of this is rigorously scheduled except for that our day does not start before 7 a.m. and they must be in bed by 8:30 p.m. Not negotiable. It's that whole "I love sleep more than life" thing again.


7 a.m. - Boys are awake and have started to keep themselves busy in their cribs or swings. I often hear them chattering before I even get out of bed. The morning does not usually start with crying as it previously had.

8 a.m. - First bottle of the day and continued play time. Usually in their jungle tunnel while I wake up, have some iced coffee, prepare to start the day.

8:30 a.m. - Nap time in their swings. This is my largest chunk of the day to get stuff done. Shower, blog, clean, food prep.

10:30 a.m. - Boys are usually awake by this point and having playtime again. 2nd bottle whenever they start to get fussy.

Noon - 2nd nap in their swings. Usually a shorter nap for one of the boys (they like to alternate) and a normal nap for the other.

1:15 -1:30 p.m. - First baby wakes up and gets to come downstairs and play in the high chair and have a meal of solid foods. They are just practicing eating so I don't expect them to obtain many calories from this - just new textures, flavors and most importantly, the routine of having a lunch. 2nd baby is usually awake shortly after this.

2 p.m. - 3rd bottle of the day and playtime downstairs with different toys.

3:30 p.m. - Short nap in swings or Pack'N Play - maybe about 45 minutes or so.

5 p.m. - "Daaa" (Andy) gets home from work. 4th bottle of the day and playtime until they start to get fussy. They are usually more fussy in the evenings from about 5 -7 (the "witching hour" as I've heard it called) They may fall asleep for a short time but spend the majority of the evening awake and playing with Daaa, going for walks, etc.

7:30 p.m. - Bath time starts. They love it. Even if they have been fussy for the last 2 hours, they still get the smiles when it's bath time. I think they really like being nakey.

8 p.m. - 5th bottle of the day (this one will be a larger, six ounce bottle with cereal added) and the boys will be swaddled and in bed by 8:30.

8:30 p.m. - Our time. It's glorious, as I may have mentioned. We're working our way through Dexter right now!


Activities the boys can do at this age:

  • They enjoy all of the previously listed activities PLUS 
  • Playing in their Exersaucer
  • Practicing rolling (both directions) on the floor during playtime
  • "Talking" to each other (sometimes it's more like shrieking or screaming though)
  • Practicing sitting up like adult babies and pulling into a supported standing position - and lots of bouncing! 


I may have even caught them attempting to crawl a few times.

They get lots of tummy time and floor playtime - I have read a blog post from an occupational therapist that they should have a minimum of 90 minutes of tummy time a day so that is what we strive for. It's definitely getting their little bodies working because once I put them down, they are almost never in the same spot when I turn around again!

Friday, July 25, 2014

Pregnancy To-do List: Stock Your Freezer!


One of the smartest things I did while pregnant was think ahead. About food. Because I'm almost always thinking about food anyway. When would I have time to cook once the babies were here? Would we starve? Would Andy cook all the time? Nope nope nope! We were going to have a freezer stash full of healthy and already prepared foods - I was determined! 

I made sure to look up recipes and make my grocery list well ahead of time although I didn't actually cook everything and assemble the freezer meals until about a month beforehand. I was somewhat afraid I would eat it all and then have to start from square one. It's something I would definitely do - I know me pretty well! 

 I knew that it would be a weird transition for me to be home at nights and needing to have food figured out for when Andy got home from work. My work schedule has always been evenings so dinner every day of the week is just something I've never done. You can't eat pizza every night! Or can you?

I chose 5 recipes to cook/assemble and it took us about 3 months to use up all of the freezer food. Now I'm starting to make some of the recipes again to have on hand for busy weeks. Andy even requested some of them so you know they were a hit!

1. Slow Cooker Cheesy Chicken and Rice  I had made this recipe before and knew that I wanted it on my list right from the beginning. It's easy, filling and has a lot of protein, which you need as a preggy person and probably after being preggy as well. It makes a lot of food which I then put into individual meal containers and froze.

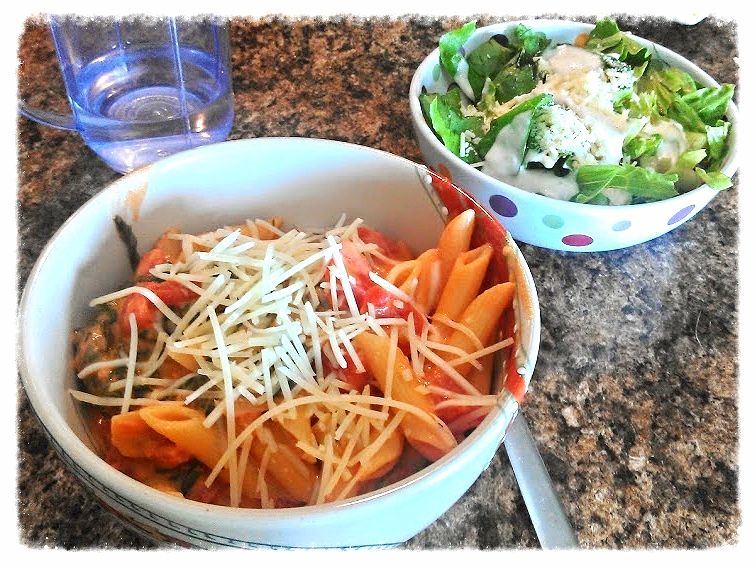
2. Pasta Fagioli Soup (an Olive Garden copycat - Recipe below!) My mom has made this for years and I got the recipe from her. I have no idea where she found it but it is IDENTICAL to the soup they serve at Olive Garden. Once again, it makes a huge batch. I filled Ziploc quart sized bags with the cooled soup and froze (laying flat in the freezer so they didn't take up much room)

3. White Chicken Chili  This is the recipe I wasn't too fond of. I'm not sure if it was just because it was frozen or if it's just not as good as the recipe that's been hanging around my family for years but I would skip this one next time (Ha! Next time!... NO.)

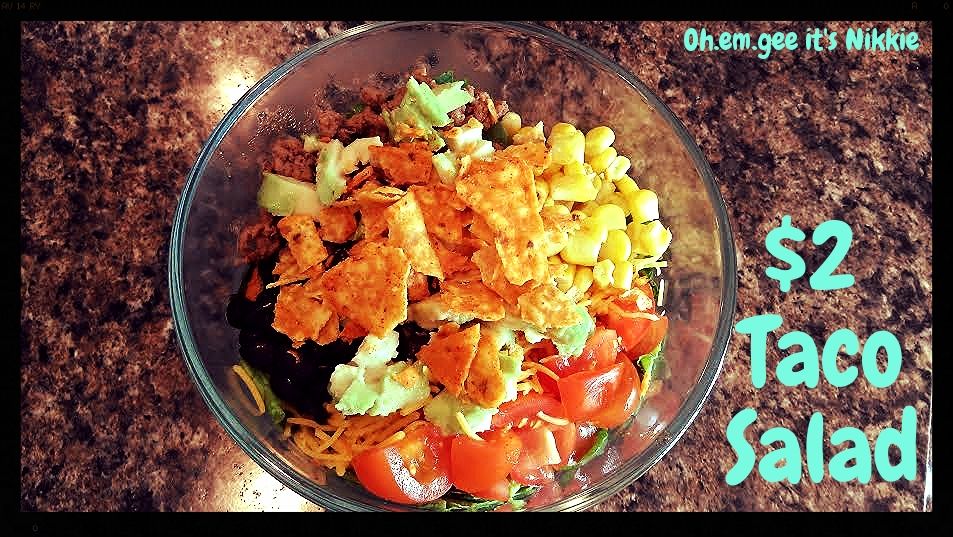
Love the serving suggestion... tortilla chips, sour cream and cilantro! Yum!
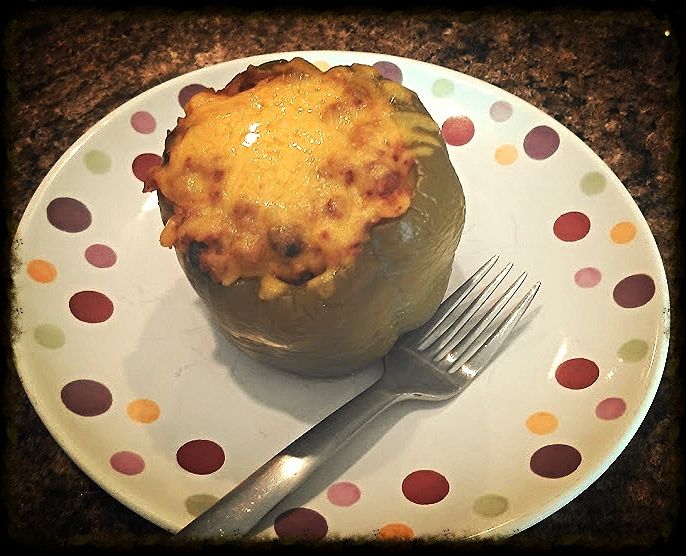

 4. Crock Pot BBQ Chicken (served over white rice) This recipe is nice because you literally throw all of the ingredients into a Ziploc bag and freeze for the prep! When it comes time to cook, you pull it out of the freezer the night before and then dump in the crock pot in the morning. Hot, delicious meals ready without any fuss.

5. Crock Pot Teriyaki Chicken (served over white rice) Equally as delicious as the BBQ chicken and just as easy. This was Andy's favorite out of the make-ahead meals!

So easy! Follow me on Pinterest for more easy meals!


 In hind-sight, I would double the amount for the BBQ Chicken and Teriyaki Chicken recipes because they were SO easy and now I'm hungry for them again!

Start planning your make-ahead and freezer stash meals early - you never know if your babies will be early (like mine!) You WILL be hungry, and probably exhausted too!

Olive Garden Pasta Fagioli 


Ingredients:

  • 1/2 cup water, divided 
  • 1 lb extra lean ground beef 
  • 1 cup onion chopped 
  • 1 cup carrots slivered 
  • 1 cup celery diced 
  • 2 14 1/2 oz cans of petite diced tomatoes 
  • 1 14 1/2 oz can red kidney beans 
  • 1 14 1/2 oz can white beans like northern or navy 
  • 5 1/2 cups of beef broth 2 tsp oregano 
  • 1 1/2 tsp ground black pepper 
  • 1 T parsley 
  • 1 tsp Tabasco sauce 
  • 32 oz spaghetti sauce 
  • 4 oz dry ditalini or small shell pasta 

Instructions:
Saute beef in 1/4 cup water in a large pot until the beef starts to brown. Drain. Add 1/4 cup water, onions, carrots, celery and tomatoes and simmer for about 10 minutes. Drain and rinse beans and add to pot. Add beef broth, oregano, pepper, parsley, tabasco, spaghetti sauce and noodles. Simmer until carrots and celery are tender or about 45 minutes.
This makes about 5 qts of soup or 12 servings. Make one day ahead for the best flavor. Can freeze!

Happy nesting! (Does this count as nesting??? I feel like it does!)

Wednesday, July 23, 2014

What I Ate Wednesday - Homemade Peanut Butter Granola Bars


Follow me on Pinterest for more tested and approved recipes!

Saying that Andy eats a lot of granola bars would be an understatement. It's more like a butt-ton (a personal favorite unit of measurement) of granola bars. Every morning for breakfast. And he can eat 2 of them without being even close to satisfied. So, me being me, got tired of spending lots of money on granola bars and wanted to try to make them on my own. And it has to be healthier, right???

I followed this recipe for no-bake granola bars and it was easy and fast! As usual, I didn't exactly follow the directions and I definitely didn't measure anything... so here is my interpretation of the recipe! It made 5 large (I'm talking probably 3 times the size of a store-bought one) granola bars and Andy has approved this recipe!

Ingredients:

  • 2 cups quick cooking oats
  • 1 cup Rice Krispies
  • 1/4 cup shredded coconut
  • 1/2 stick of unsalted butter (I plan to use 1/2 of that amount next time to cut back on calories)
  • 1/4 cup honey (I may use maple syrup in the next batch - honey is expensive!)
  • 1/2 cup light brown sugar
  • 1/2 tsp salt (original recipe called for this but I left it out)
  • 1/2 tsp vanilla
  • 2 tbs peanut butter
  • 1/4 cup mini chocolate chips
Instructions:

1.  In a large mixing bowl, mix together the oats, cereal and coconut.  Set a small saucepan over medium high heat and melt the butter.  Add the honey, brown sugar (and salt if you wish). Stir together then leave it alone as it comes to a boil.  Once the boil has reached all the way around the edges of the pan, begin timing.  Allow this mixture to boil for 2 minutes and 15 seconds. (I only did 90 seconds because it got out of control - my bad.) Add the peanut butter at the end of this and stir in completely.

Heat that deliciousness to a rolling boil - but keep an eye on it!

2.  Pour the mixture over the oats. Mix the ingredients together until the oats are completely coated.  Let cool before adding chocolate chips.

Mix it all together - you're almost done... already!


3. Press very firmly into a lightly greased pan. (The original recipe calls for a 9x13 pan but I used one about 1/3 the size of that because I wanted super thick bars)  If you do not press firmly enough, the bars will fall apart when you eat them.  Place them in the fridge for 20 minutes then cut to size. You can add additional toppings at this point and then wrap in saran wrap or store in re-useable containers. Enjoy!

Feel free to go crazy with the toppings! Or just leave them plain... your choice!


Total cost: I'm not really sure because I only had to purchase the oats and Rice Krispies - everything else I had on hand! But it sure does feel a lot less expensive than buying 2 or more boxes of granola bars a week!

Variations I plan on trying: Pumpkin pie, white chocolate, dark chocolate and almonds, dried berry, candy bar, maple bacon! I'll let you know how it works out!

Check out additional variations via the original posting on Made From Pinterest!

Monday, July 21, 2014

Introducing Baby to Solids


First time in the highchair and he is extremely skeptical!

Okay, so technically they didn't start solids the way most babies do. We did put some rice cereal in their bottles starting around 9 weeks old to help keep them more full during the night (and it works, like whoa!) But I didn't want to start them on a bland rice or oatmeal as their first food that they would eat off of a spoon - especially a store bought one. So we started with actual foods - and we started them at 14 weeks! It's good practice for them and I think it has helped them learn not only the routine of sitting in their high chairs for a meal a day, but also with their coordination and interest in food!

First food - pears!

I knew from even before I was pregnant that I wanted to make all of their food from scratch. I love to cook. It would be less expensive. I could control what they eat better and make sure that it is only the most nutritious. All of my favorite things - cooking, thriftiness, control -muahaha! But seriously, it is so easy to make your own baby foods that I cannot understand why more people don't do it. There are "recipes" for almost every food imaginable  - steam/microwave/peel/dice and then puree or mash. EASY!  Then there are some recipes that I have found that use your crock pot (Chicken and butternut squash, anyone?) 
More peas, pwease!
Other than looking online for "recipes" I did read one book - The Baby and Toddler Cookbook: Fresh, Homemade Foods for a Healthy Start by Karen Ansel and Charity Ferreira. It's not so much that the "recipes" in this book are helpful - it's the other information about nutrition, food preparation, how to introduce your baby to foods, etc. If you're only going to read one book about baby foods - I would recommend this one because it's comprehensive and concise!

Take a look inside through Amazon.com!

So far the boys have enjoyed pears, peas, green beans, carrots, banana, brown rice and oatmeal cereals (I made these cereals for less than a penny a serving!) We just introduced sweet potato with pumpkin pie seasoning - you can include spices, herbs and seasonings for older babies but I just couldn't wait! I have the freezer stocked with all of those plus avocado, applesauce, and pumpkin to try within the next few weeks. Their favorite food so far is sweet potatoes with pumpkin pie seasoning - when I made it, I almost decided to eat it for lunch myself. Seriously. Recipe below!

 Since they have enjoyed these foods separately so far, I have started to combine them to make delicious combinations. Their favorite combination right now is peas, banana and oatmeal. I tried it and I can vouch for its deliciousness. These kids have good taste already.


Frozen in 1-ounce cubes for easy storage and portioning!

At 17 weeks old, I am only introducing solids at one meal a day. Usually in the afternoon when we have more time. I watch carefully for signs that they hate my cooking. Just kidding, I watch for signs of them being full or not interested - nobody doesn't like my cooking! Sometimes I let them hold the spoon (without food on it) and they gnaw on it and try to jab themselves in the face with it. But it is all a learning process still at this point and I want them to enjoy the experience.

Pumpkin Pie Sweet Potato Baby Food:
Homemade for $0.15 an ounce!

What you'll need: 

  • 2 lbs sweet potatoes - about 4 mediums
  • 1/4 tsp pumpkin pie seasoning
  • 1/4 cup water, formula or breast milk

Instructions: 

Wash and scrub sweet potatoes, puncture skins multiple times with a fork. Place on a baking sheet and cook at 400 degrees for 45 minutes. Let cool. Remove skins (they should peel right off) and scoop out flesh. Place in food processor, blender, baby food maker (click the links to see what I use/recommend!) and pulse until they reach a creamy consistency. Thin puree with water if needed to reach desired consistency. Add 1/4 tsp of pumpkin pie seasoning and blend once more. Spoon into ice cube trays and freeze until solid. 

Look for additional baby food making "recipes" and their current favorite food combinations to come in later posts... I can't wait for these little guys to be good eaters so we can enjoy meal times together as a family!

Friday, July 18, 2014

Keeping it Simple with Homemade Taco Seasoning

Have your dinner plans ever been knocked down because you ran out of taco seasoning? For some reason I could never keep taco seasoning stocked in my cabinets... I'm not sure if we just went through it so quickly or I kept forgetting to buy it but I never had any! It was a very frustrating predicament to have especially when I went through the effort of meal planning and then had to deviate. Well, a few weeks ago I decided enough was enough and I raided my spice cabinet and made my own taco seasoning. It was delicious. I will never go back to the packaged, processed, extra salty stuff ever again.

Follow me on Pinterest for more delicious recipes!

I made a quadruple batch of this recipe that I found on Pinterest and I store it in a little mason jar. So cute! So thrifty! So delicious! I found out that I already had almost all of the ingredients in my cabinet so I only needed to buy one additional seasoning the next time I went to the store. I have used about a tablespoon for each 1/2 pound of ground turkey that I make (the heck with ground beef, we love ground turkey in the household!)

Try it for yourself and see what you think!

Ingredients: (for 1 oz.) I quadruple this so I can have some ready at all times!
  • 1 tablespoon chili powder
  • 1/4 teaspoon garlic powder
  • 1/4 teaspoon onion powder
  • 1/4 teaspoon crushed red pepper flakes - (I may or may not have used a tad extra... Hint: I did.)
  • 1/4 teaspoon dried oregano
  • 1/2 teaspoon paprika
  • 1 1/2 teaspoons ground cumin
  • 1 teaspoon sea salt (I skip the salt completely... it doesn't need it!)
  • 1 teaspoon black pepper

Instructions: You literally combine all ingredients in a small bowl and store in an air-tight container. Yay!

Fun fact! I used this taco mixture to season the ground turkey for the $2 Taco Salad!

Wednesday, July 16, 2014

What I Ate Wednesday - Buffalo Chicken Salad

 Buffalo... Chicken. Salad! It's what's for dinner.
I like to make at least one salad a week for dinner. Because it's healthy. Because it's maybe the only vegetables I will get Andy to eat all week. Mostly because I personally love salads - really good salads! I also love buffalo chicken... anything - dip, sandwiches, wraps, pasta  - if it's buffalo chicken flavored, I'll eat it. Probably. Let's not get carried away here. Here is my recipe for an easy buffalo chicken salad. Do the prep work once on Sunday and you can eat it for lunch every day for a week! 

 Buffalo Chicken Salad

Ingredients:

  • 4 Breaded chicken tenders - we use Tyson brand
  • 1/4 cup Frank's hot sauce
  • 1 head of Romaine lettuce
  • 1 cup shredded mozzarella cheese
  • Handful of cherry tomatoes
  • Blue cheese crumbles
  • Blue cheese or ranch dressing
  • Croutons (optional)

Instructions:

1. Chop, rinse and dry lettuce. Using a salad spinner is super helpful and I think it keeps our leftover lettuce fresher for longer.

Why yes, we do buy our hot sauce by the gallon.


2. Place chicken tenders on a lined toaster oven tray or baking sheet (we use the toaster oven for this... I think it's faster!) Spread hot sauce on top side and bake using instructions on the bag for about 1/2 of the time. Flip half way and spread other side of the tenders with the hot sauce. Cook until outside is crisp. Let cool for a few minutes and then give them a rough chop.

3. Assemble your salad - lettuce, mozzarella cheese, diced or halved cherry tomatoes, blue cheese crumbles, chopped buffalo chicken. Serve with blue cheese or ranch dressing on top or on the side, if you're like me.


Enjoy!

Monday, July 14, 2014

How to Stay Sane as a Stay-at-home Mom - Part 1: BOOKS!


Some of you may be staring at the title of this post with a shocked expression on your face. "She needs things to occupy her time? As a new mom? To twins???" Yes. I don't know if you've noticed this, but newborns are exceptionally boring. I'm sure it's a world-wide phenomena, not just how it was with my new babies. They eat, poop, cry and occasionally sleep for the first 8 or so weeks before they start to develop their perfect little personalities. Mostly boring stuff.  Now that they're old enough to be interactive, there is the occasional day where I long for this early stage again - but they are mostly awesome now at 16 weeks!

So you're home alone, with 2 newborns, and the largest part of your day is spent feeding them if you were anything like me. We breastfed for the first 8 weeks and it was pretty much all time consuming. One of the things that I liked best about breastfeeding is that once they're latched, you're pretty much hands free. But you're sitting still. Bored. So I kept my Kindle near where I nursed the babies and let me tell you, I got through 9 books in the first 8 weeks! That's a heck of a lot of time. I don't think I have ever had time to read like that before in my life.

I'm a huge fan of my Kindle. It's old. It's a hand-me-down. But it's awesome. I can download books from the library through Amazon and I don't even have to leave the house, ever! One of the main reasons I didn't read too much prior to this amazing Kindle acquisition was that I didn't like to go to the library because it's overwhelming and I found the organization system confusing. That could just be me though. I also just don't like to leave the house. Also, I don't like to pay for books - so as much as I loved to hang out in the bookstore, I just couldn't stand the idea of having to pay so much for a book I would read once or twice. Ughhh. And then along came the Kindle!


I'm sure you're on the edge of your seat waiting to see what I read by this point! Sure, I read a couple of semi-interesting Nicholas Sparks books - but they're SO predictable. Easy reading though. There was one book that shall not be named that I could barely get through. Ugh. And then there were 3 books that I would re-read in an instant - they were fantastic!

3. The Kite Runner by Khaled Hosseini


2. Life of Pi by Yann Martel


1. The Fault in Our Stars by John Green

I'm not going to summarize these books because you're all adults and can do your own Google searches but I am going to highly recommend them to... EVERYONE.


Ironically, someone thought these books were all good enough to be made into movies - I found that out after I read them all. I have yet to see any of these movies though because I am afraid they will ruin the precious memories of how good the books were.

I am currently looking for more books to get started on since I came pretty close to depleting my wish list! What suggestions do you have for me?

Friday, July 11, 2014

3 Awesome Wedding Gifts


Follow Oh.em.gee it's Nikkie on Facebook so you never miss a post!
My sister is getting married in December (Yay, Jenn!) and I have been contemplating what to get her for a wedding gift for, oh, maybe a year or so. They recently put together their wedding registries and it got me thinking about what I would have put on mine if I were to go through all of that again. (Side note: I never plan on going through the headache of wedding planning again, so you're safe for now Andy!) What are the most useful gadgets in my house? What do I use the most? What would be the.most.awesome. wedding gift to give?

I compiled a list of the 3 things that I use on pretty much a daily basis that I think would make awesome wedding gifts (Spoiler alert: LOOK AWAY NOW, JENNIFER!)  and this is what I came up with:

1. Calphalon Nonstick Cookware Set: I cook A LOT. I use these on a daily basis and I think is is absolutely vital to have good cookware. It lasts a long time and did I mention the NONSTICK part? Vital. The bigger the set, the better too! There is not a part of this set that I don't use on a weekly basis but my favorite piece is the covered skillet because it's so versatile. It's expensive, but people tend to be generous with their wedding gifting!


2. Ninja Food Processor/Blender: I started out with a base model that Andy bought me for Christmas and then later upgraded to this one. This is my second most-used kitchen gadget and you can do pretty much anything with it! Seriously, I have made guacamole, banana ice cream, chopped pretty much everything and even made baby food in this thing! This could replace a regular blender, food processor, smoothie maker, baby food machine, you name it. You could have so.much.extra counter space freed up!

3. Wii U: This one might seem a little silly to register for, and Andy really did try to sneak some stuff like this on our registry, but it is another thing that we use every day. And not just because we REALLY like to play Mario Kart. We don't have cable since we cut back on unnecessary costs several years ago so we use Netflix through the Wii U for all of our television viewing and most of our movie nights. Right now, we're working through Dexter and I'm watching Orange is the New Black on my own.


Register for these items - I highly doubt you will regret it! Do you have anything that you put on your registry that you couldn't live without? Any recommendations for my sister putting hers together? I'd love to hear your input.

So which one will I buy Jenn for her wedding gift? We'll see! 

**Disclosure statement

Wednesday, July 9, 2014

What I Ate Wednesday - Creamy Tomato and Spinach Pasta

Italian food. I would eat it everyday if it were up to me! Unfortunately, Andy doesn't appreciate the finer things in life. Like pasta. Or Veggies. Definitely not the two combined. So while I thought this recipe was delicious and I would definitely eat it again, he only had a "no thank you" portion and didn't even eat all of that. Bummer. Because it really was delicious!

I followed this recipe that I found on Pinterest, although I believe the original recipe may be from this site. This beautiful photo pulled me in... I could not resist!
So beautiful. So pasta-y.

I would, however, make a few changes when I make it again. Note to Andy, if you're reading this, I do plan on making it again!

Ingredients:
  • 1 Tbsp olive oil
  • 1 small onion - (I elect to use only 1/2 an onion)
  • 2 cloves garlic
  • 1 (15 oz.) can diced tomatoes
  • ½ tsp dried oregano
  • ½ tsp dried basil
  • pinch red pepper flakes (optional) Side note: definitely NOT optional in my household! I put red pepper flakes in everything.
  • freshly cracked pepper to taste
  • ½ tsp salt
  • 2 Tbsp tomato paste
  • 2 oz. cream cheese
  • ¼ cup grated Parmesan  (Get a little extra to add on top when finished!)
  • ½ lb. penne pasta
  • ½ (9 oz.) bag fresh spinach - (Use ALL the spinach! It's super healthy for you.)

Instructions:
  1. Cook the penne pasta - penne was a great choice for this recipe as it holds the sauce super well! I always go a little heavy on the pasta, just because! I probably would use about 3/4 of the box instead of 1/2.
     
  2. The original recipe calls for you to dice the onion. Next time I will puree it in my Ninja food processor - I freakin' love that thing! I found the chunks of diced onion just didn't quite do it for me in the recipe but I still want the flavor. So puree your onion (I also would only use 1/2 an onion) and mince your garlic. Cook in olive oil in a skillet for a few minutes until it is aromatic.
     
  3. Add the diced tomatoes (with juices), oregano, basil, red pepper flakes, salt, and some freshly cracked pepper to the skillet with the onions and garlic. Stir to combine. Add the tomato paste and a ½ cup of water to the skillet and stir until the tomato paste is dissolved into the sauce. (I wouldn't change a thing to this step - the flavors were perfect!)
     
  4. Turn the heat down to low. Stir the cream cheese into the tomato sauce. Stir the sauce until the cream cheese has fully melted in and the sauce is creamy. Add the Parmesan cheese to the mixture and stir until fully dissolved and creamy. At this point, it is definitely okay to start drooling because you're almost done.
     
  5. Add the fresh spinach (I plan on adding the whole bag next time because, why not? You have a full bag and it's so nutritious... seriously, why not?) and gently stir it into the sauce until it has wilted (3-5 minutes). Add the pasta and stir until it is well coated in the creamy tomato sauce.

  6. The original recipe did not call for any additional Parmesan cheese added on top once served. I was appalled! I added some to mine and it was fantastic. 

Finished product - served with a Caesar salad!


This recipe makes for excellent leftovers, too. In case you never got the memo, I love leftovers. Although I love to cook, I don't like to do it everyday. Primarily because of the dishes!

Monday, July 7, 2014

Those Funny Little Things - Vet Tech Edition

The last few days, we have been on vacation. So I somehow haven't had very much time to write and somehow had a lot of time to Pinterest. How does that work???


 I am a full-time mom and a part-time vet tech. I have done a lot of thinking about how my tech training and experience will come in handy with having two boys.

1. I will be able to effectively restrain my children during the toddler years... without getting bitten.
2. I can calculate an appropriate dose of diphenhydramine based on their weights.
3. Minor laceration? I'm on it!

But in all seriousness... 

If you know me, and you probably don't, you know that I love cats and almost all animals. Almost all of them. German Shepherds, I'm looking at you. It seems like anyone who is not capable of training a dog gets a German Shepherd. It's beyond me!

Being a veterinary technician is definitely my calling in life, despite the poorly behaved shepherds and crazy pet owners. There are the good times and there are the bad times, just like any job. Except it seems to be taken to the extreme in the veterinary medicine field. The good times are really really good and the bad times are horrible. If you don't have a sense of humor, this probably isn't the job for you! (Among many other traits you should probably have...)

One of my co-workers has been posting a lot of vet tech related memes on Pinterest over the last few days and I have found myself laughing out loud at them. Literally LOL-ing. So I thought I would share them with you so you can see a bit of my dorky work-related humor!

This. This this this! 
At least once a day. Probably more!
It's like winning the lottery! Or as close as I'll ever get to winning the lottery...
Are there any other fellow vet techs out there reading this??? I'd love to see your favorite work-related memes! Follow me on Pinterest for more funny little things!

Friday, July 4, 2014

Twin Baby Boy Nursery Tour


Find more Pinterest inspired nursery ideas here!

When we were first planning to have a baby, we had a room set aside and I practically had the whole nursery planned out in my head. The day we found out that we were having twins, that had to change. The original room was WAY too small for two babies.We had to reconfigure our whole house!

It was absolutely mandatory to paint a grey and white striped accent wall and paint the rest of the walls grey. Boy or girl. Or 2 boys or 2 girls. I'm a person who knows what she wants! Unless I'm hungry and it is in regard to food. Andy can vouch for me there. Actually, let's not even go there.

So here is a tour of Emmett and Oliver's nursery! We finished it with 8 whole days to spare before they were born... whew!


Want it? Get it.

The lamp is actually one of the few things we purposefully went out and bought. It's from Target and *gasp* it's from the girls section! It matches perfectly though... so don't tell anyone. 

I made the mobiles for above the cribs based off of a picture I found on Pinterest. Here is the DIY tutorial that I created to show you just how easy they were to make. 

I was not convinced we would need a diaper changing station. "Can't you just change a baby on the floor?" my naive self would ask. You can. But do you really want to do that every few hours for a year, times 2? Nope. Nope nope nope nope. The diaper caddy hanging on the wall is really useful to have things nearby.

Products we use: Munchkin Diaper Change Organizer, Minky Changing Pad Cover, Boppy nursing pillows with cute covers

And possibly the most controversial baby item, believe it or not, THE TRASH CAN. There are two schools of thought on this one. People who think you are INSANE if you do not use a Diaper Genie and people who think you are weird if you want a special diaper-holding trash can that you can only use for a few years in your house taking up space. I'll let you guess which side of that argument I'm on.

I tried to do a lot of DIY projects while I was pregnant... because, thrifty. Yup, thrifty! My favorite finishing touches to the boys' nursery are the bookshelves. The bookshelves are actually cheapo (think $4-ish?) spice racks from IKEA that Andy painted and hung. Oh yeah, thanks AGAIN Pinterest for that idea! I was adamant that the boys would have access to books in their room. I mean, how are they supposed to be baby geniuses without books? See how we made them here!

Lastly, we have a screen door. Yup, a screen door instead of a solid wood door. This serves several purposes and was a fantastic idea given to me by a co-worker. We can check on the babies without having to open and close a door. It keeps our cats out when necessary (always necessary, it seems!) without us having to isolate ourselves in or out of a room. And for some reason it gets freaking hot or cold in that room with the door shut. Poor air circulation. Whatever. The screen door is totally awesome!

Hope you enjoyed a quick peek at the nursery. It seemed so empty before we had the babies, but they quickly filled it up with their precious little bodies (all 5 pounds of them!) and ALL OF THE JUNK that comes with babies.

**Disclosure statement

Wednesday, July 2, 2014

What I Ate Wednesday - $2 Taco Salad


Don't forget to follow me on Pinterest for more recipes!

This is the most delicious taco salad you will ever enjoy. I promise. I loved taco salad before I came across this combination of ingredients but now I make this salad several times a month. Andy will even eat it. Willingly! And that says a lot.

Total cost of ingredients: $19.74

I don't usually spend that much money on one recipe, so let me explain. This is literally the BEST taco salad you will ever have! Just kidding, that's not all. I just wanted to make sure you heard me. This recipe will make 8-10 large portions. Andy and I will usually eat it for dinner 2 nights and then I will eat it all week long for lunches and STILL have some left over. Plus, some things like the cheese, Doritos and ranch will still have a good amount left to use toward other meals.

So in other words, it's about $1.97 - $2.46 a serving. Not bad at all.

Ingredients:
  • 1 head of Romaine lettuce, chopped  (1.58)
  • 1 15 oz. can of whole kernel yellow corn, drained (.68)
  • 1 15 oz can of black beans, drained and rinsed (.68)
  • 1 cup shredded cheddar (or taco blend!) (2.64)
  • 1 tomato or 1/2 pint of cherry tomatoes, diced (2.98)
  • 1 lb ground turkey (3.34)
  • 1 packet of taco seasoning (or make your own - it's much more delicious and cost-effective!) (0.00 since I make my own and have all the spices on hand)
  • 1 avocado (1.18)
  • 1 bag of Doritos (2.98)
  • 1 jar of really good, creamy ranch dressing (Hidden Valley and store brands are no good for this recipe - splurge for the good stuff!) (3.68)
Makes 8-10 LARGE dinner-sized portions.


Instructions:

1. Cook ground turkey in a skillet until fully cooked. Add half a cup of water and your taco seasoning, let simmer until water is evaporated.

2. While the turkey is cooking, drain and rinse your black beans and corn. Chop your lettuce, rinse and dry in a salad spinner (what a nice, handy gadget that I didn't think I would ever use. Thank you to whoever gave that to me as a wedding gift!)

3. Layer all ingredients in a large salad bowl or on individual plates - Lettuce, corn, black beans, cheese, tomato, meat, avocado, crushed Doritos, ranch dressing - and you're done!

**Disclosure