
It seems like nursery decor goes one of two ways - minimalist or way-oh-my-god over the top! While browsing Pinterest - something that by now you know I NEVER do - I have come across both types of nurseries. I knew I would be on the more minimalist side of the debacle because I wanted to keep the nursery low-cost and also fairly basic so I could adjust it to grow with my boys. No "big boy" wants a room that still looks like a baby room. Here are some of the DIY projects we did while nesting!
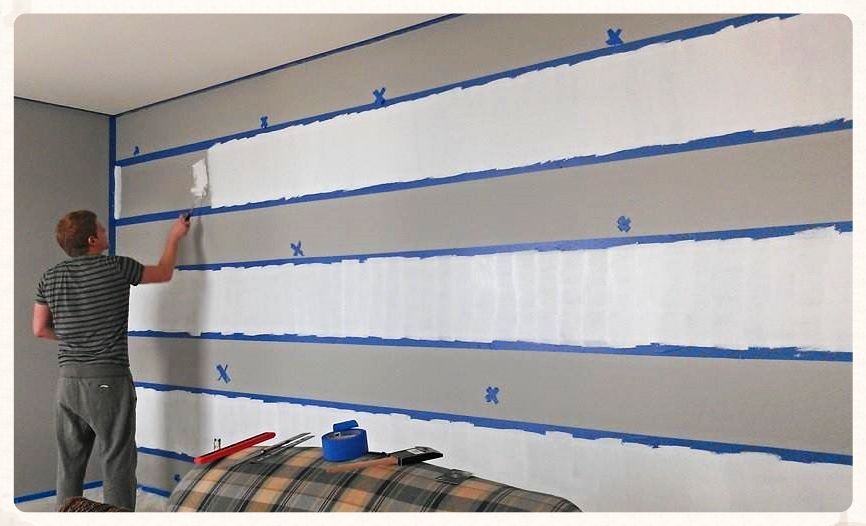 |
| This was hour #3 - and I'm pretty sure we hadn't figured out our measuring mistake yet! |
DIY Mobile
In my
Pinterest-ing adventures, I came across these beautiful mobiles. I wanted
them. But they were $63.00. EACH. Ain't nobody got the money for that!
Even though I am the least crafty person I know, I decided to make
mobiles myself and I'm proud to say they turned out decently - I'm sure
you could do a better job though - and they only cost $18.00 for BOTH.
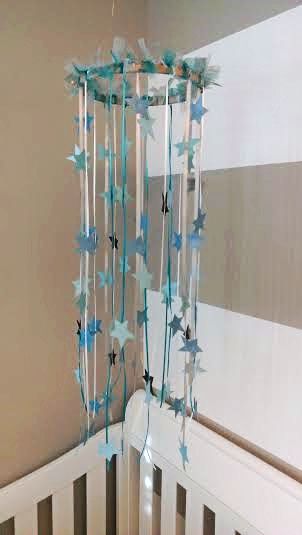 |
| Not bad, not bad at all! |
- Two hoops of some sort or another type of base (I purchased the 2 most inexpensive wooden hoop things at Jo-ann Fabrics. They were about $3 each.)
- Ribbon to cover the wooden hoop (I chose sheer, slightly glittery ribbon in 3 colors - silver and two blues from the dollar store)
- Shape punch (optional) I borrowed a star shaped punch from my Grandmother. You can use whatever or even hand cut shapes if you're patient enough.
- Ribbon in various lengths (again, I went to the dollar store and chose several colors of thin ribbons)
- Glue
- Pretty paper - about 6 sheets per mobile. Jo-Ann Fabrics has a wide variety of thick, card making papers. You'll need extra if you want to do both sides to cover the ribbon and glue to give it a more finished appearance. I didn't have the patience to do this.
- Clear string or thread (to suspend mobile from the ceiling)
- Appropriate hardware to hang mobile
1. Cut various lengths of ribbon that will hang from the mobile. Punch or cut out shapes from paper. Glue shapes onto ribbon - do both sides if you want a more finished look. Let dry.
2. Tie ribbon to hoop and adjust lengths to your liking. Take sheer ribbon and cut into pieces that are just long enough to tie around hoop and give character to the top of the mobile. Tie ribbon the whole way around the hoop.
3. Use clear string or thread to attach to hoop. Have husband (you're pregnant, remember?) attach hardware to ceiling and hang mobile!
4. Celebrate the fact that you saved so much money for something that is not 100% necessary to have in a nursery!
Bookshelves from Spice Racks
If you're
on Pinterest, like ever, I'm sure you've seen the ten thousand nursery
decor pins that show these cute little spice racks - you guessed it -
turned into bookshelves. I saved this idea in the depths of my brain the
first time I saw this. I knew I wanted to do that for the boys'
nursery. Not optional. It's a thrifty alternative to those costly
bookshelves - and super cute, too!
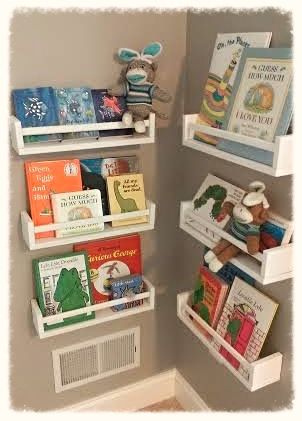 |
| The boys have quite a book collection already! |
We purchased 6 of them from IKEA - they're really inexpensive since they're technically spice racks, not bookshelves. Andy painted them white to contrast the grey nursery wall. Let them dry. Hung them. Voila! Seriously, that's it. It was so easy and inexpensive. Somebody was a genius. But it wasn't me.
I'd love to see any DIY projects or nursery decor that you have done!
No comments:
Post a Comment